Aztek
Aztek splash screen

Free and open source 3D

Model, rig, animate, simulate and render. One application, the way you already work.

Modelling, UVs, rigging, animation, cloth, particles, rigid bodies, a path tracer and USD, with the industry-standard commands, flags, hotkeys, menus and marking menus. MEL and Python scripts run, .ma files open and save, .mb files open, production rigs pose. Over fifty example scenes to start from. MIT-0, for Linux, Windows and macOS.

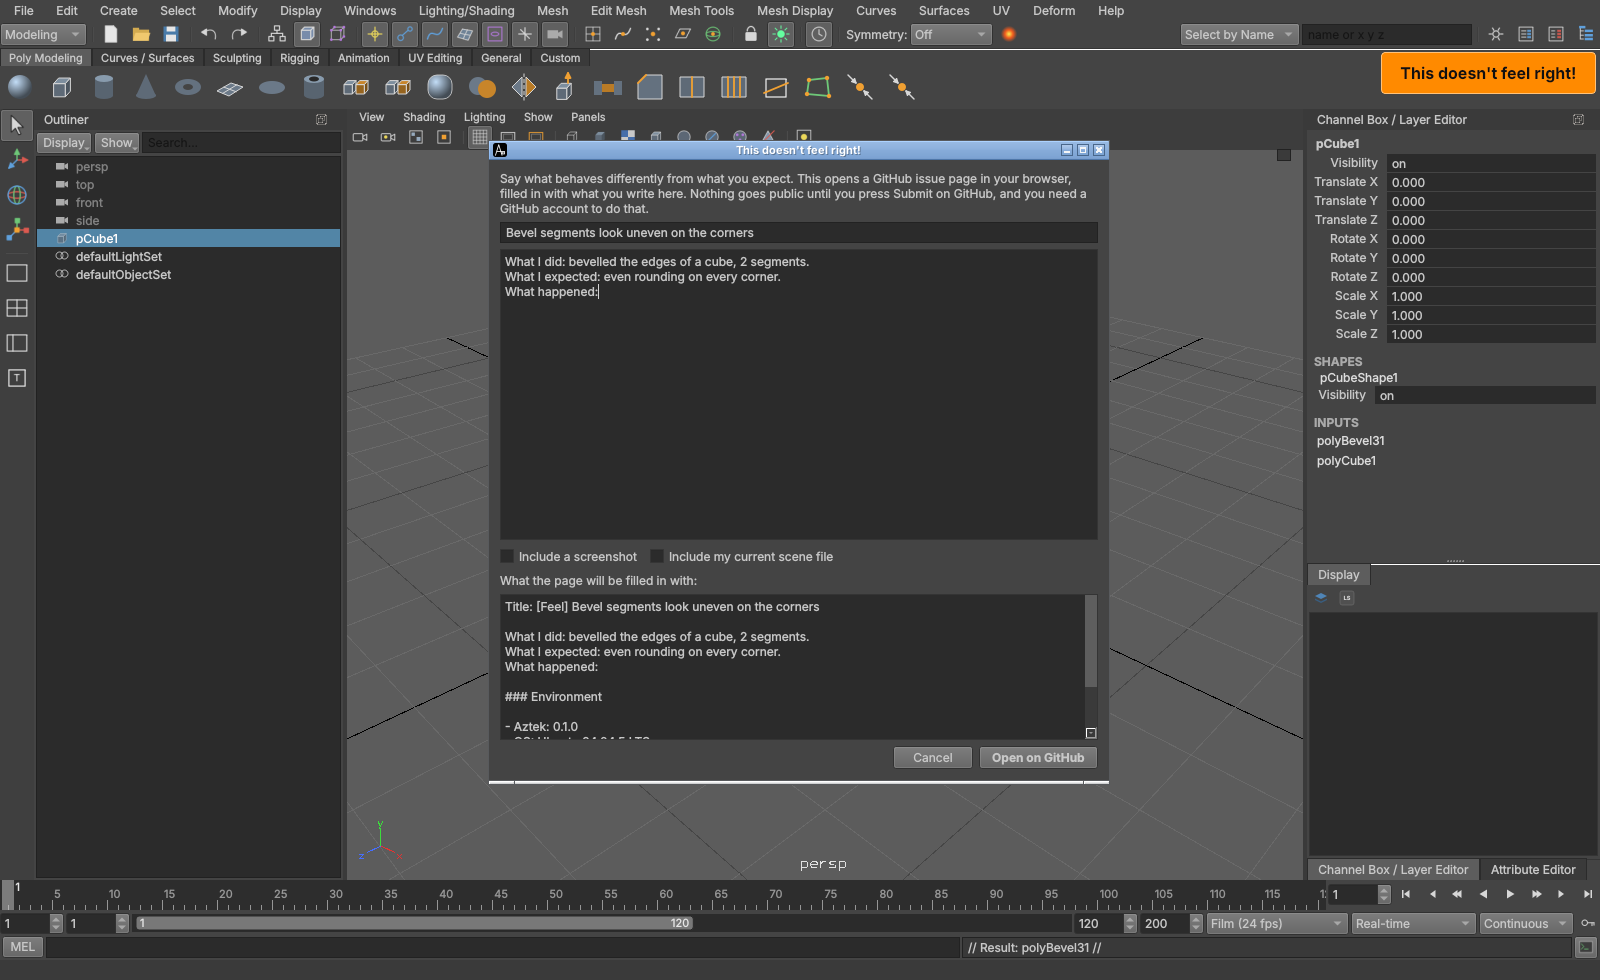
This doesn't feel right!

Anything off? One button.

Aztek should feel like second nature to anyone who has spent years in a 3D package. If something doesn't work, or works but doesn't feel quite right (a hotkey, a drag, a default, a menu in the wrong place), press the orange button at the right of the shelf bar. The small arrow on its left folds it away; it stays in the Help menu.

Say what you did and what you expected; that's the whole report. Add a screenshot you can draw on, or a copy of the scene, if it helps. It opens a filled-in GitHub issue in your browser, so every rough edge anyone notices ends up in one public list. Nothing is sent until you press Submit there.

The This doesn't feel right! window over the main window

Fix it yourself

If something is wrong and you can see how to fix it, fix it and send the change. Small fixes are as welcome as large ones, and there is nothing to ask first. Three ways. Click one to unfold it:

By hand: build it, change it, send a patch or a pull request
  1. Get the tools, the source, and build it. You need git, and gh (GitHub's command line tool) if you will send a pull request.

    Linux

    sudo apt install git   # or dnf, pacman
    git clone https://github.com/srlegrand/Aztek.git
    cd Aztek
    ./build.sh --deps --run

    For gh, follow its Linux instructions: the one Debian and Ubuntu ship is too old to work with GitHub.

    macOS

    brew install git gh
    git clone https://github.com/srlegrand/Aztek.git
    cd Aztek
    ./build-macos.sh --deps --run

    With Homebrew.

    Windows

    winget install --id Git.Git
    winget install --id GitHub.cli
    git clone https://github.com/srlegrand/Aztek.git
    cd Aztek
    .\build.bat -Run

    From PowerShell, with Visual Studio 2022 and Qt as the README says.

    Open a new terminal after installing. Then, once, sign gh in to your GitHub account (a free one will do):
    gh auth login
    Answer GitHub.com, HTTPS, Yes to authenticating Git, and "Login with a web browser": it shows a code, opens the browser, and you paste the code there. A patch attached to an issue needs no gh, only the account.
  2. Find the code. The Rust core is under crates/, the Qt interface under app/src. Searching for a command's name, a menu label or an error message usually lands on the right file. PARITY.md says how each area is meant to behave.
  3. Make the change and check it. ./build.sh --run rebuilds and starts Aztek; cargo test -p aztek_scene runs a crate's tests.
  4. Send it. As a patch, with no fork needed:
    git add -A
    git diff --cached > my-fix.patch
    and send it with Send the patch below. Or as a pull request, with gh signed in: the first command makes your own copy of the repository on GitHub, the last pushes your branch there and opens the pull request.
    gh repo fork --remote
    git checkout -b my-fix
    git add -A
    git commit -m "What the fix does"
    gh pr create --fill
With an LLM, nothing to install: the source zip and a chat

No git, no build: a chat service that takes a file and can give one back is enough.

  1. Download the source (.zip, about 30 MB)
  2. Start a new chat, attach the zip, and send this with the problem filled in. If the service refuses the zip for its size, unzip it and zip only crates, app, CLAUDE.md and PARITY.md (about 5 MB).
    The attached zip is the source of Aztek (https://github.com/srlegrand/Aztek), a 3D application
    with a Rust core under crates/ and a Qt interface in C++ under app/src. Unzipped, everything
    sits in one top folder (Aztek-main).
    
    Read CLAUDE.md first: it holds the project's rules and layout. PARITY.md says how each area
    is meant to behave.
    
    The problem:
    <What you did, what happened, and what you expected instead. Paste the issue's text and
    its number if there is one.>
    
    Do this, in order:
    1. Find the code responsible and tell me what causes the problem.
    2. Make the smallest change that fixes it, in the style of the code around it. Don't
       refactor, rename or reformat what the fix doesn't need.
    3. If the fix can be tested, add a test in that crate's tests/ folder.
    4. If the change alters behaviour that PARITY.md describes, update PARITY.md.
    
    Give me the result as one file to download, named my-fix.patch: a unified diff that
    `git apply` accepts, with paths from the repository's root (a/crates/..., b/crates/...,
    without the Aztek-main folder), holding only the lines that change and their context. Add
    no credit or attribution lines anywhere. If you can't make a file, put the whole diff in
    one code block.
    
    Then tell me, in a few lines: the files you changed and why, how to check the fix by hand
    in the app, and what you could not build, run or verify.
  3. Save what it gives back as my-fix.patch and send it with Send the patch below. You need a GitHub account for that, nothing else.
  4. Say in the issue that the patch was made this way and has not been built or run: nobody has yet seen it work, so it gets checked before it goes in.
With an LLM, in the built source

A coding assistant that can read the folder and run commands in it can find the code and make the change with you, and build and test what it changes. Clone and build first, start the assistant in the Aztek folder, and give it this, with the problem filled in:

You are working in a clone of Aztek (https://github.com/srlegrand/Aztek), a 3D application
with a Rust core under crates/ and a Qt interface in C++ under app/src.

Read CLAUDE.md first: it holds the project's rules and layout. PARITY.md says how each area
is meant to behave.

The problem:
<What you did, what happened, and what you expected instead. Paste the issue's text and
its number if there is one.>

Do this, in order:
1. Find the code responsible and tell me what causes the problem before changing anything.
2. Make the smallest change that fixes it, in the style of the code around it. Don't
   refactor, rename or reformat what the fix doesn't need.
3. If the fix can be tested, add a test in that crate's tests/ folder, and run the crate's
   tests: cargo test -p <crate>.
4. Build with ./build.sh (build.bat on Windows, ./build-macos.sh on macOS) and fix what
   doesn't compile.
5. If the change alters behaviour that PARITY.md describes, update PARITY.md.
6. Don't commit or push, and add no credit or attribution lines anywhere.

When you are done:
- run: git add -A && git diff --cached > my-fix.patch
- list the files you changed and why, in a few lines
- give me the steps to check the fix by hand in the app
- say plainly what you could not test or verify

Then build, start Aztek and check the fix yourself by the steps it gives: it can be wrong while sounding sure. Read the patch before sending it, and say in the issue what you checked.

Send your fix

Two buttons, each opening a filled-in page on GitHub. A free GitHub account is all either needs.

You have a patch file

No git needed. On the page that opens, drag my-fix.patch into the box named The patch and press Submit. A pull request is opened from it and linked there a minute or two later.

You pushed a branch to your fork

On the page that opens, read it over and press Create pull request.

A patch file and a terminal, and you would rather open the pull request yourself? With gh signed in:

gh repo fork srlegrand/Aztek --clone
cd Aztek
git checkout -b my-fix
git apply ~/Downloads/my-fix.patch
git add -A
git commit -m "What the fix does"
gh pr create --fill

One fix per patch, a line on what was wrong and what happens now. A change you send goes in under MIT-0 like everything else. The full steps are in the README.

Download

Built from every change to the main branch.

Windowsinstaller .exe, 64 bit Windows.zip, no install Rocky Linux 9.rpm Rocky Linux 8.rpm, own Qt Ubuntu 24.04.deb Ubuntu 22.04.deb Any Linux.AppImage, nothing to install Linux, Flatpak.flatpak file Linux, snap.snap file Linux.tar.gz, needs Qt 6 macOSApple silicon, .zip, early
Source on GitHub Fork it on GitHub Copy it anywhere All releases

Windows: run the installer, or unzip and run aztek.exe. Rocky Linux: sudo dnf install ./aztek-*.rpm (Rocky 9 needs EPEL for Qt). Ubuntu: sudo apt install ./aztek_*.deb. Other Linux: chmod +x aztek-*.AppImage and run it. macOS: brew install python@3.12, unzip, then right-click Aztek.app and Open the first time (it isn't notarized). Linux and Windows need a Vulkan driver. Aztek can tell you when a new version is out and install it: it asks on first start, and asks GitHub for nothing but the latest release.

Why

The tools we build our work on shouldn't belong to whoever bought them last. Too many of them were bought, left to stand still, and kept on subscription while bugs older than some of the people using them went unfixed. Aztek works the way you already work, and it belongs to everyone who uses it: no account, no subscription, no owner who can sell it, shelve it or switch it off.

Back it up, clone it, fork it. As long as one copy exists somewhere, nobody can take it away.

Copy it anywhere

Copying Aztek somewhere else is welcome. Clone it, fork it, mirror it or re-host it on any git server or other version control: Codeberg, GitLab, a forge in your country, a server at your studio, a drive in your pocket. With or without changes, under your own name or none. There is nothing to ask and no one to credit: the licence is MIT-0. Every extra copy makes the project harder to lose.

git clone --mirror https://github.com/srlegrand/Aztek.git
cd Aztek.git
git push --mirror <your repository's URL>

At a glance

01ModellingPolygons with history, NURBS, sculpting, Quad Draw 02UVsProjections, unfold, layout, cut and sew 03RiggingJoints, IK, constraints, skinning, deformers, HumanIK 04AnimationGraph Editor, Dope Sheet, layers, playblast 05DynamicsCloth, particles and rigid bodies in one solver 06RenderingHarold, a CPU path tracer, and the lights you know 07Pipeline.ma and .mb files, references, USD stages 08ScriptingMEL, Python, the API, plug-ins, script-built UI
Cloth A flag nailed to its pole, in a breeze. One of the example scenes.
History Extrude, width and bevel keyed on their history nodes and played back in the viewport.
Harold Glass, gold, chrome, plastic and car paint under a sky, the camera going round.
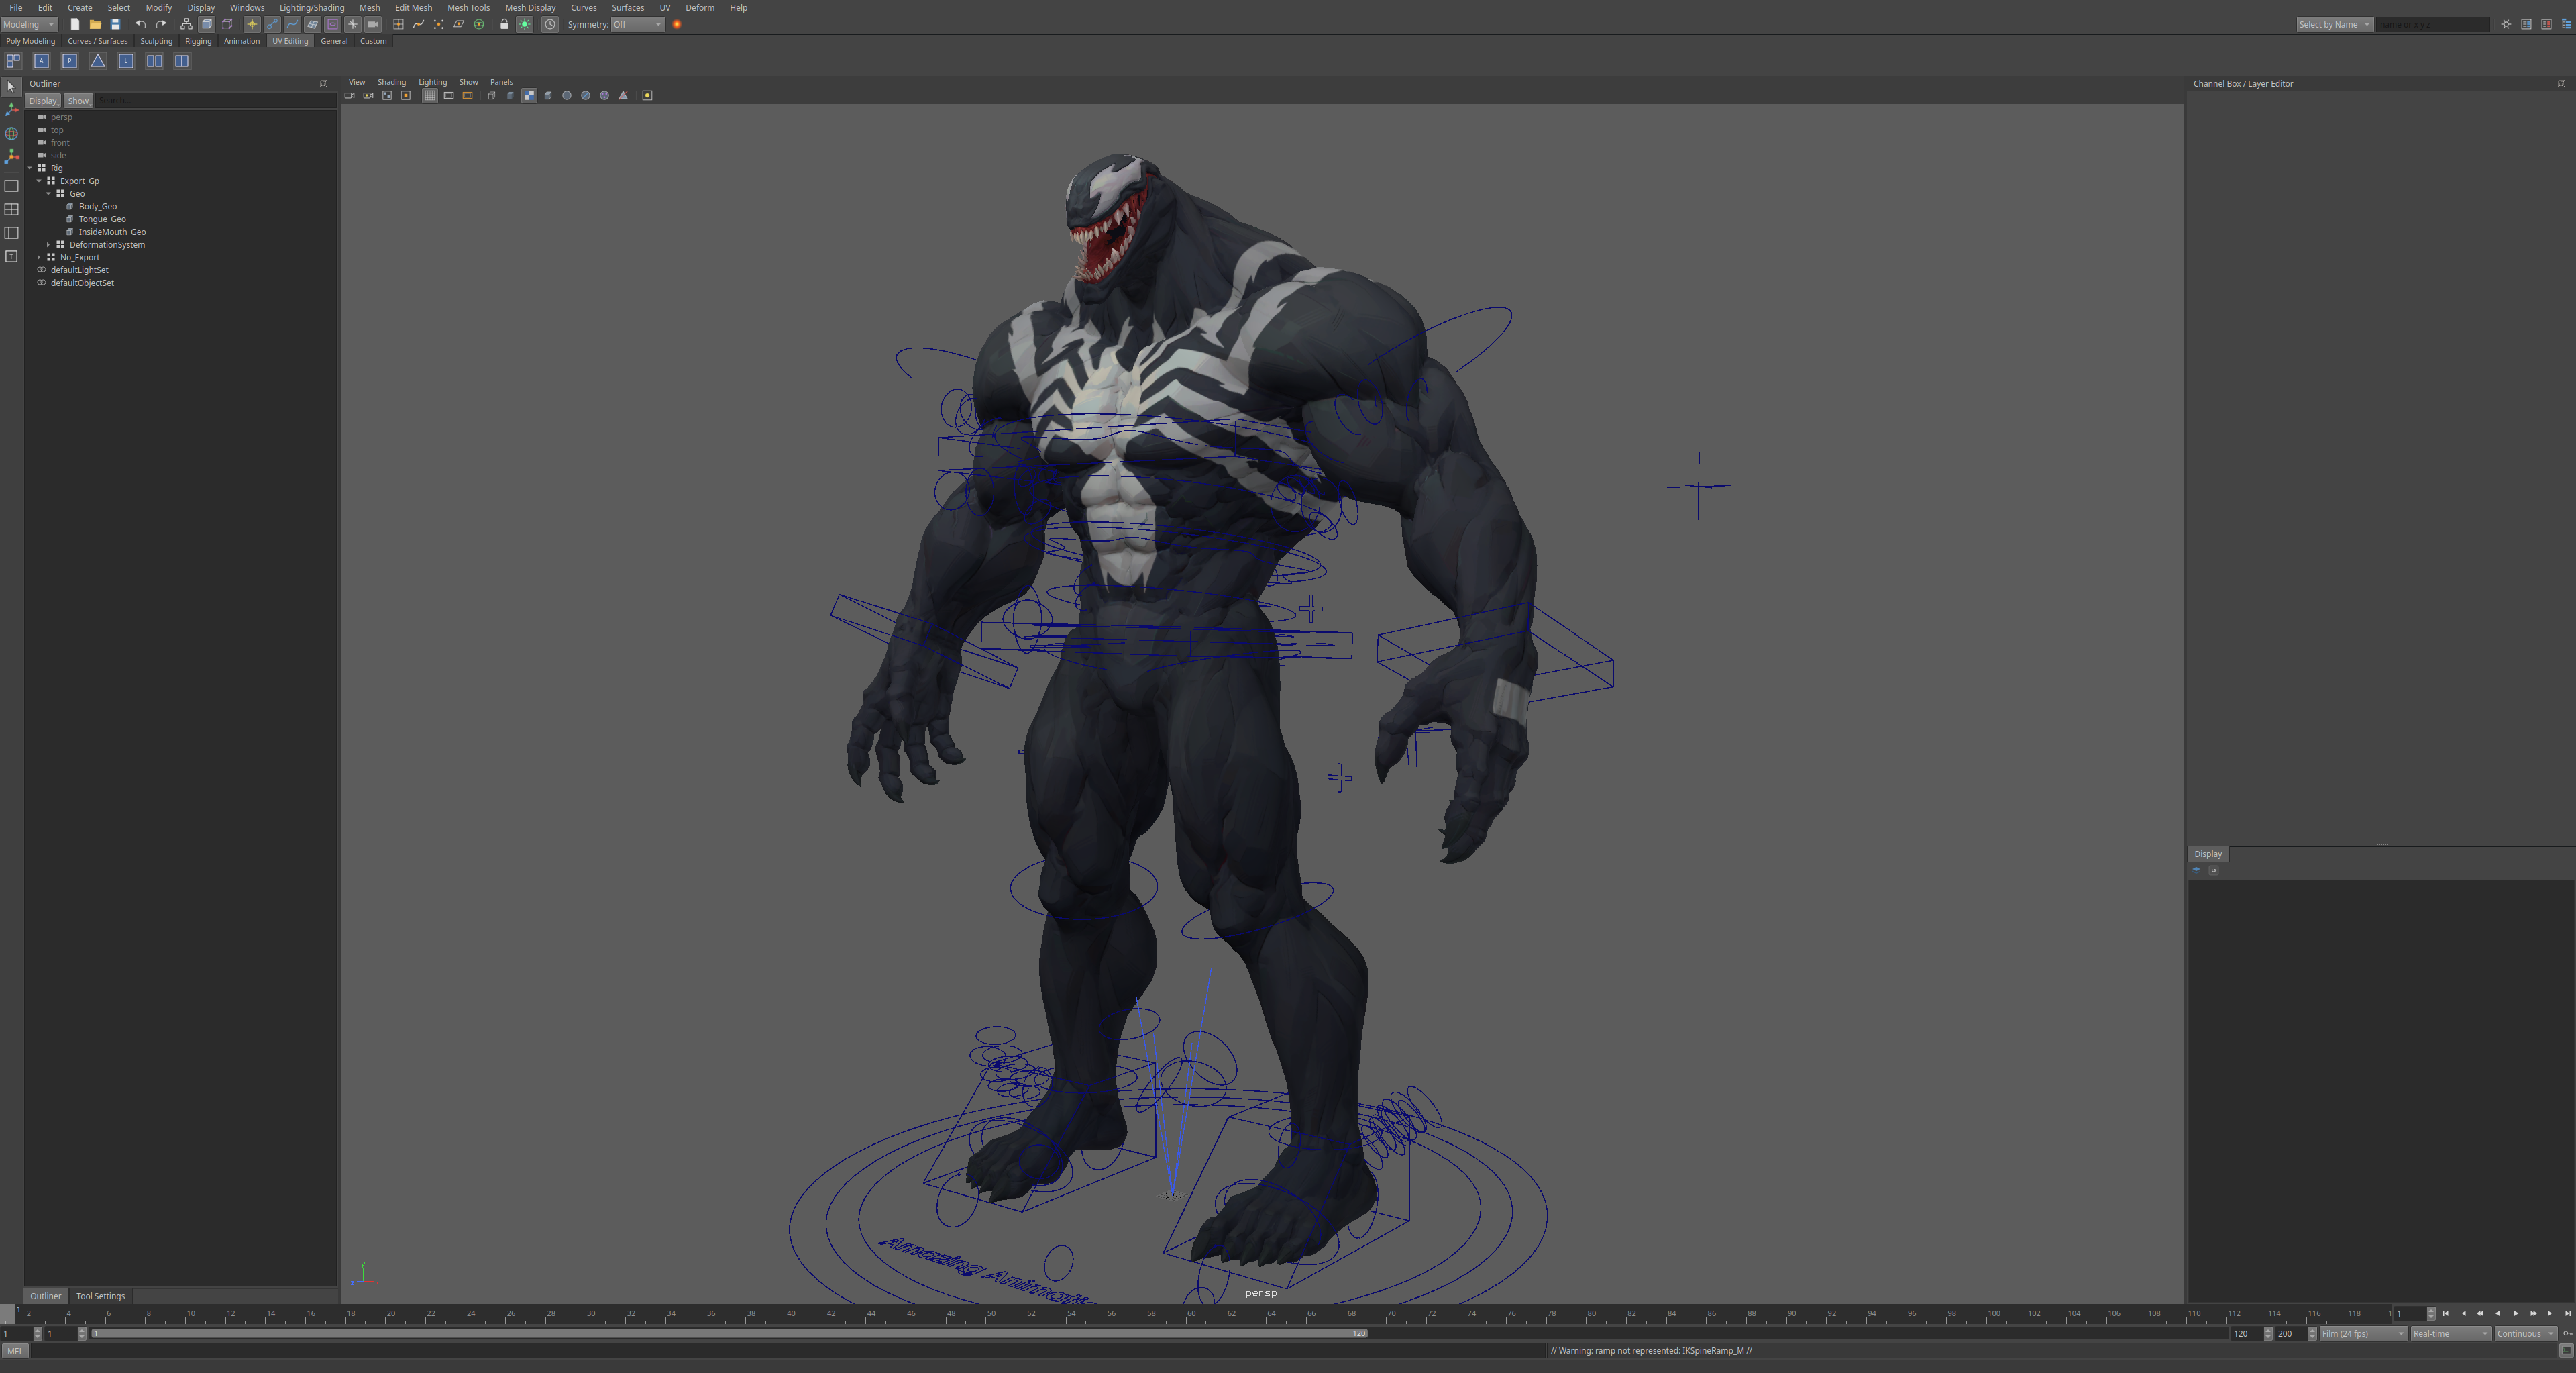
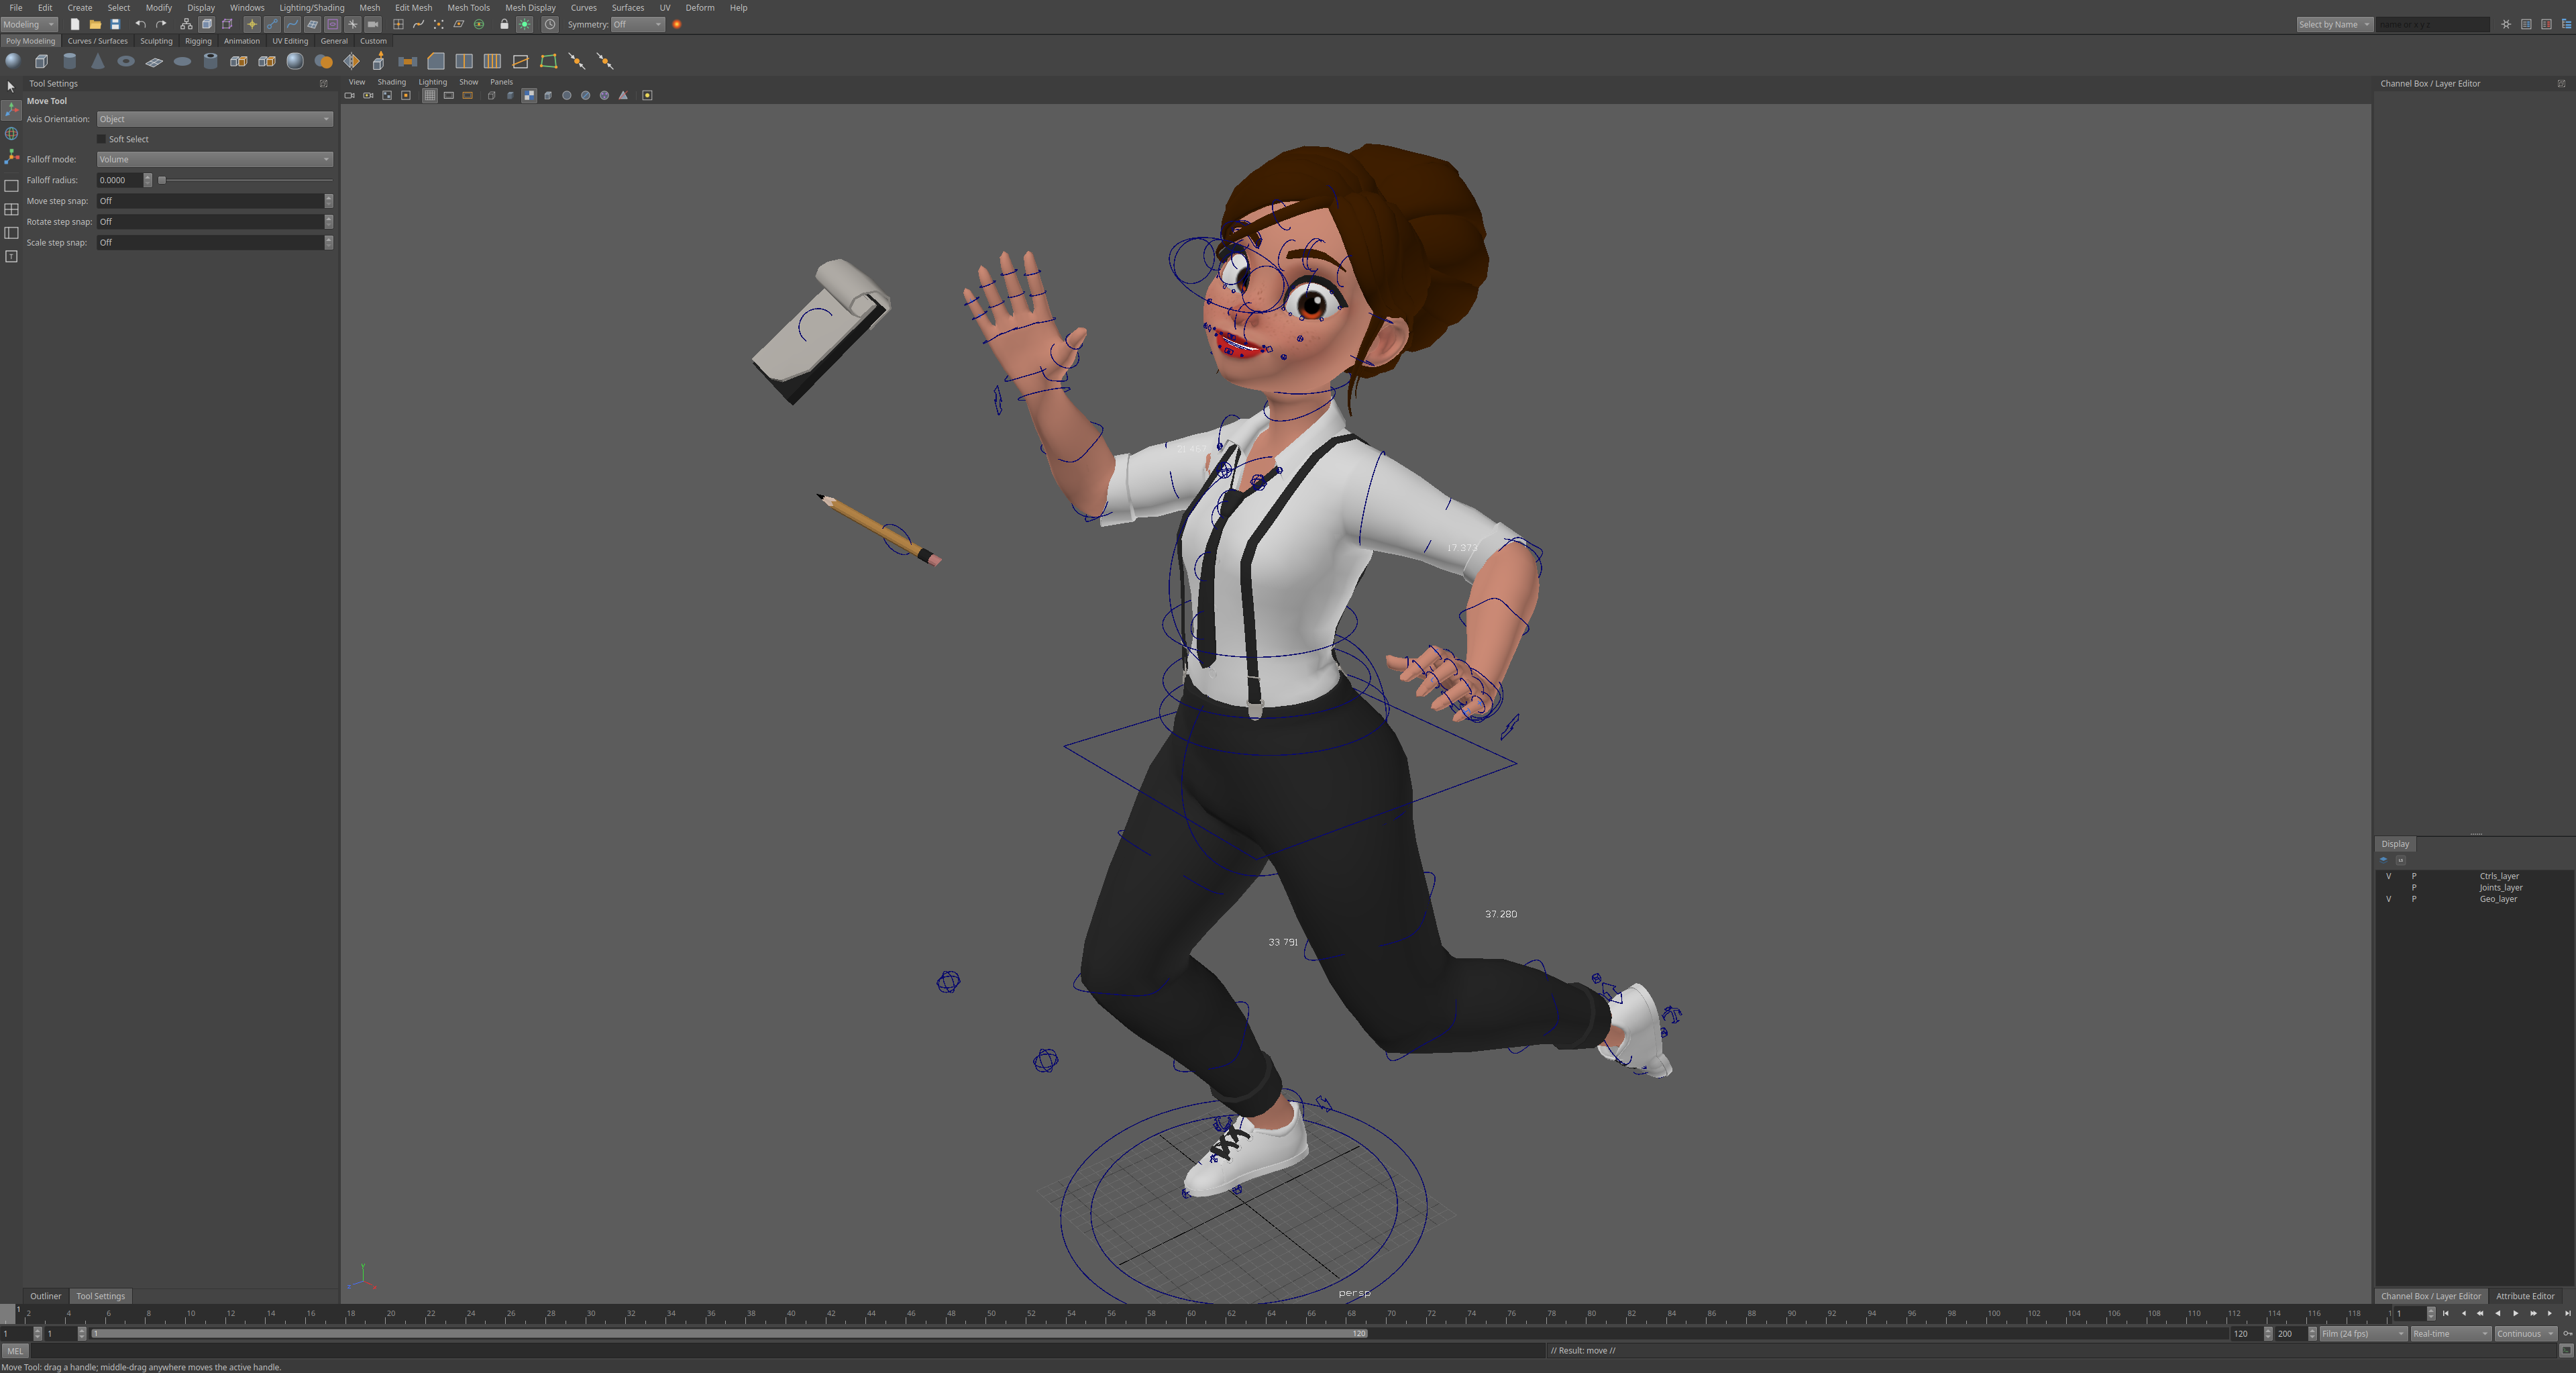
A production character rig opened in Aztek and posed
A production rig Opened from its .ma file and posed: 414 joints, 37 skinClusters, 17 blendShapes, 82 IK handles, follicles, ribbons and wires. It opens in about 3 seconds and responds in 13 to 44 ms per change.
01Modelling

Polygons, NURBS and sculpting, with construction history

The standard polygon commands, each one a history node you can go back and change.

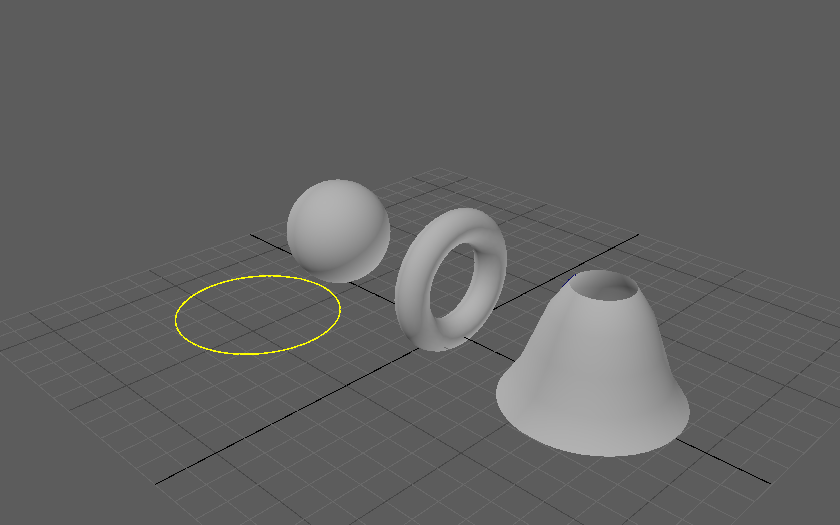
Quad Draw, Multi-Cut, Insert and Offset Edge Loop, Target Weld, Slide Edge, Crease, Create and Append Polygon, booleans, bevel, smooth, mirror; symmetry and soft selection (B), eighteen sculpting brushes. NURBS curves (CV and EP tools, rebuild, attach, detach, offset, fillets, projection, trims) and surfaces (primitives, loft, revolve, extrude, boundary, birail, nurbsToPoly), with CVs, edit points and isoparms as components.
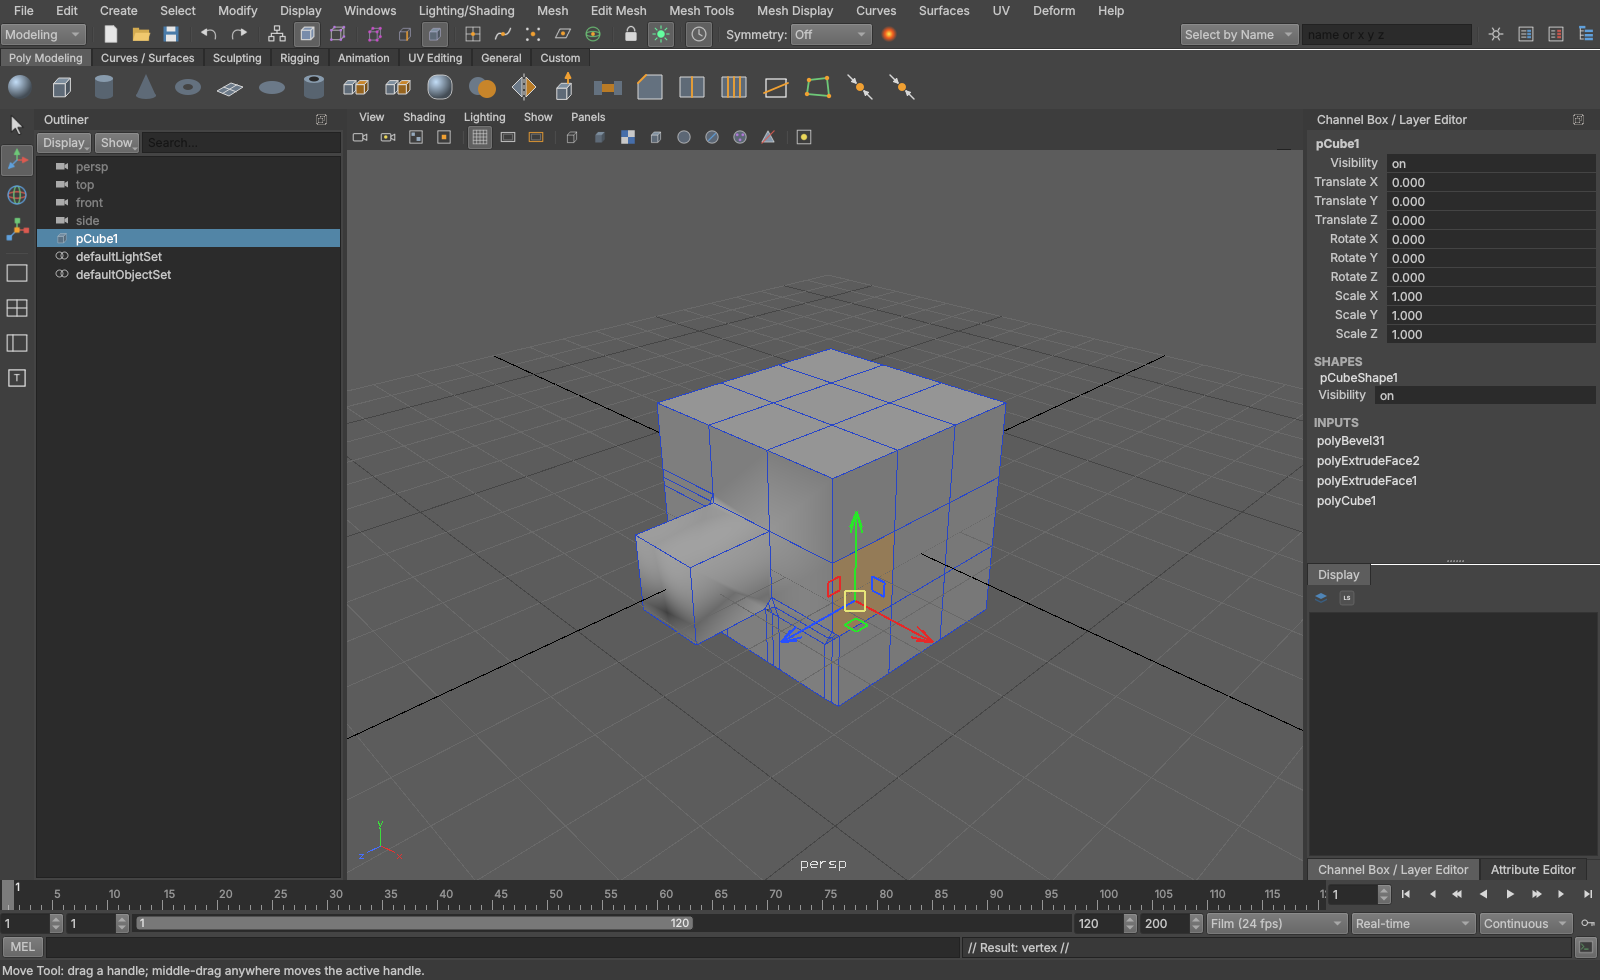
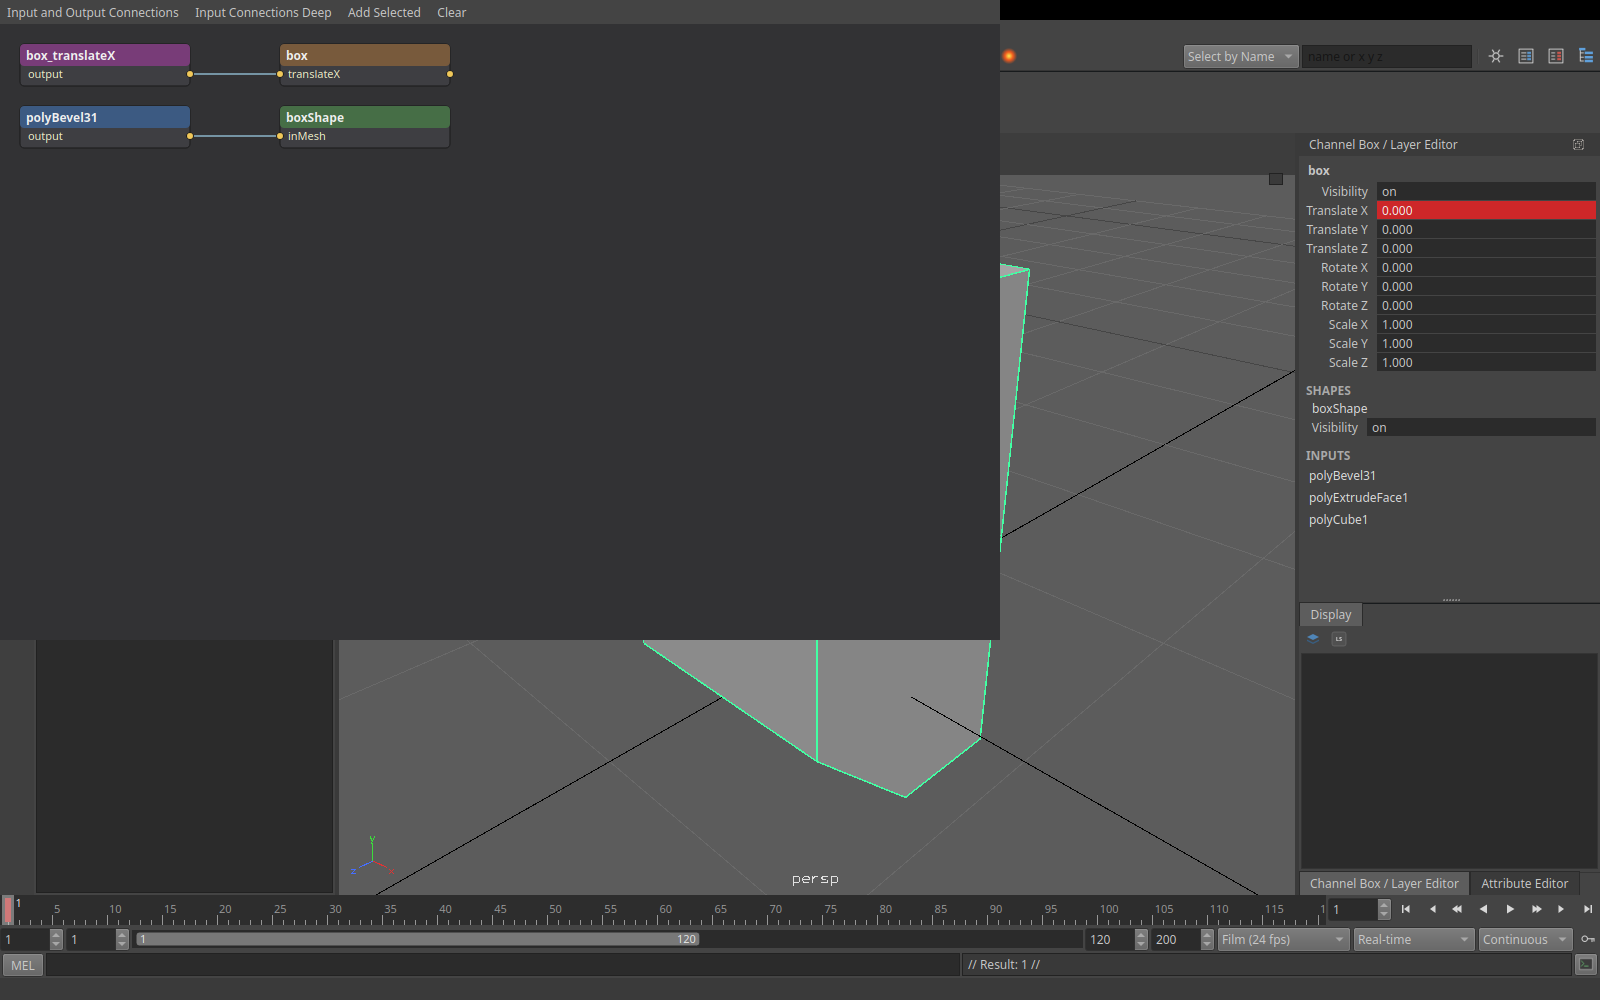
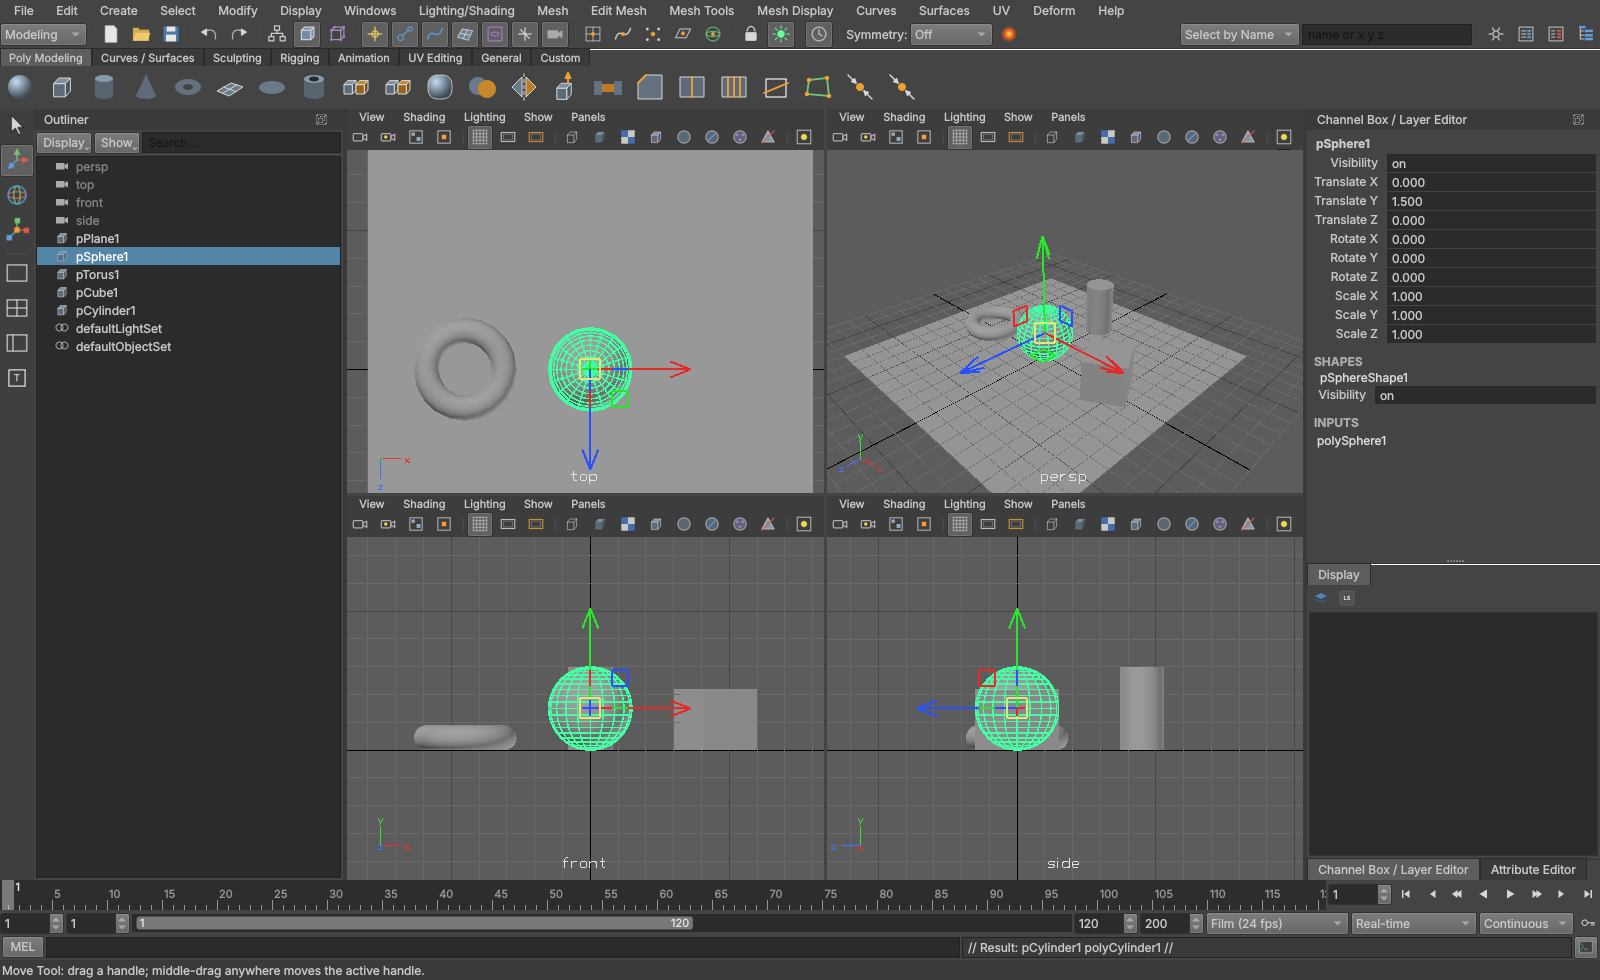
Component editing with construction history and the move manipulator
History polyExtrudeFace1 in the channel box's inputs, the move manipulator on the faces.
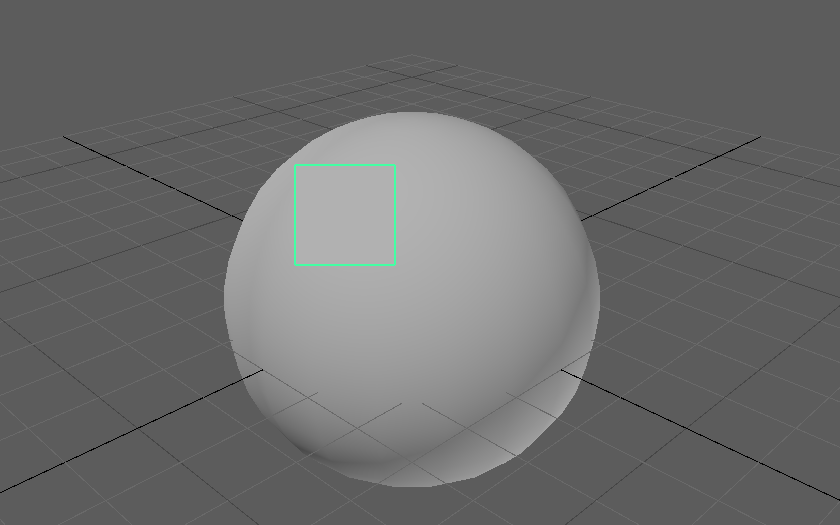
Quad Draw on a live surface
Quad Draw Retopology on a live surface.
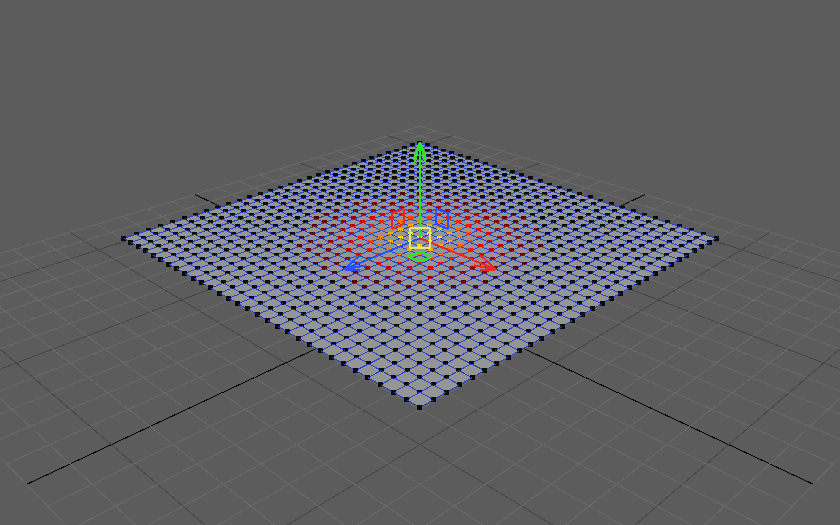
Soft selection falloff on a plane
Soft selection The falloff shown on the vertices.
NURBS surfaces and curves
NURBS Surfaces and curves, with a drawing override on the control.
02UVs

The UV Editor, by UV, shell, edge or face

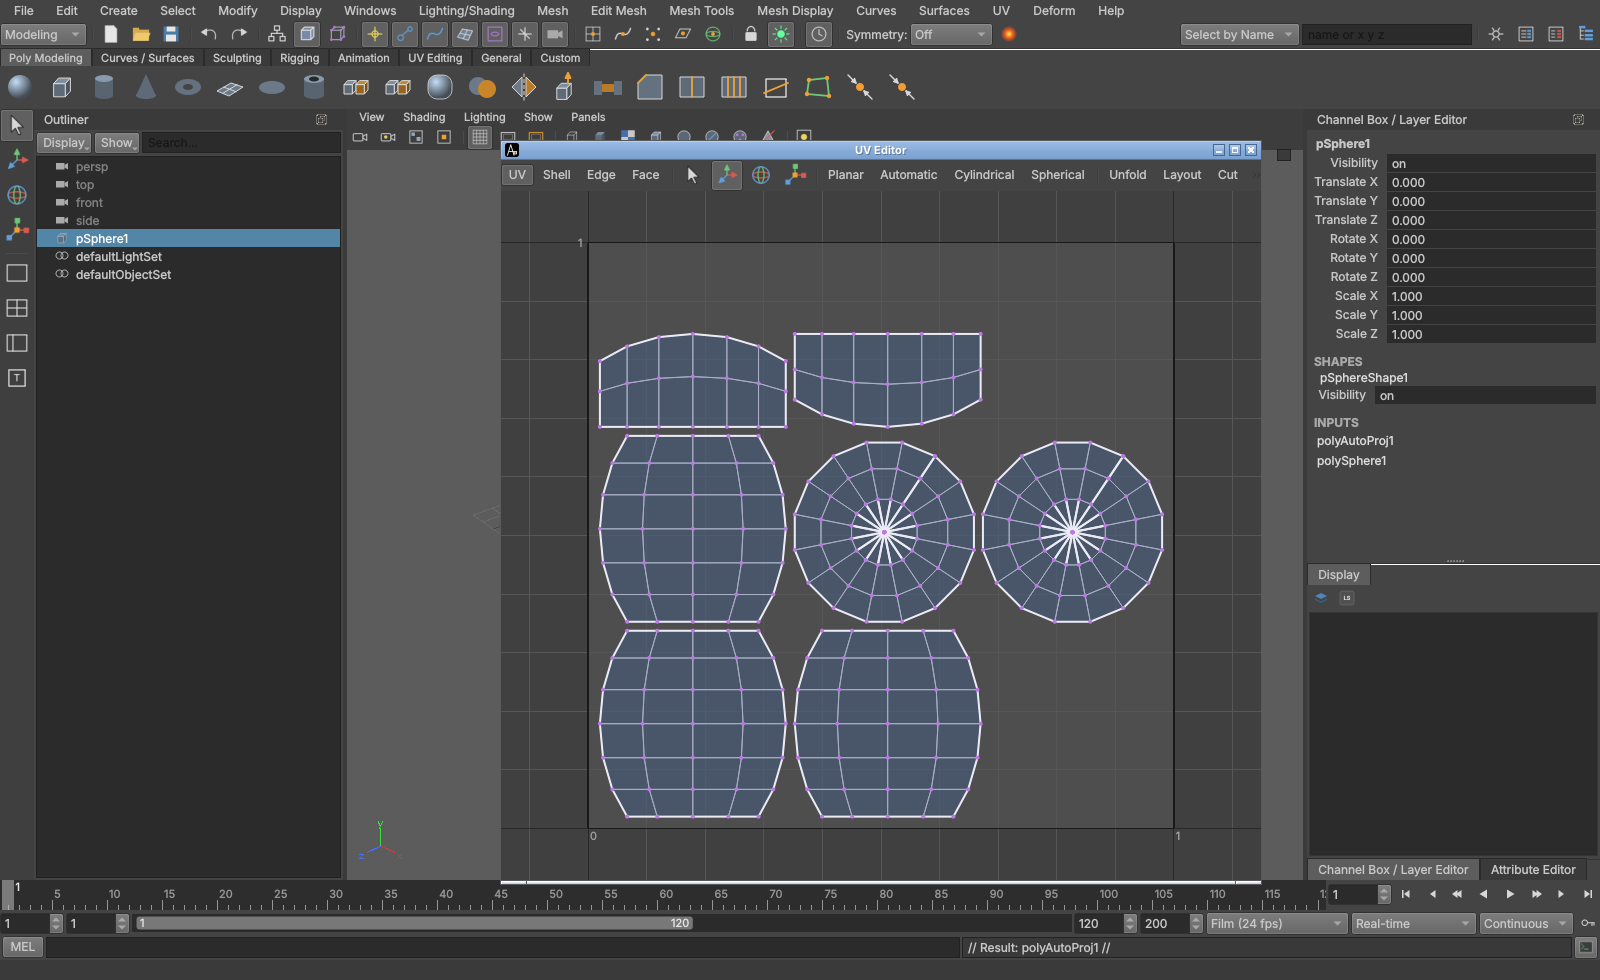
Planar, cylindrical, spherical and automatic projections, unfold, layout, cut and sew.

Move, rotate and scale in UV space, normalize and flip, several UV sets, and the texture behind the grid.

The UV Editor after automatic projection and layout
UV Editor Automatic projection, then layout.
03Rigging

Joints, IK, constraints, skinning and every deformer

Production rigs open from their files and pose.

Joints (orient, mirror, insert, segment scale compensate), RP, SC and spline IK, every constraint, smooth skin with weight painting, mirror and copy, dual quaternion. blendShape in full (Shape Editor, in-betweens, live targets), lattice, wrap, wire, delta mush, softMod, clusters, nonlinears, sculpt, jiggle, shrinkWrap, proximityWrap, curveWarp. HumanIK characters with definitions, control rig and retargeting. Controls keep their colours.

A production rig Opened from its .ma file with its textures, and posed with its own controls.
A quadruped skeleton posed with the rotate tool
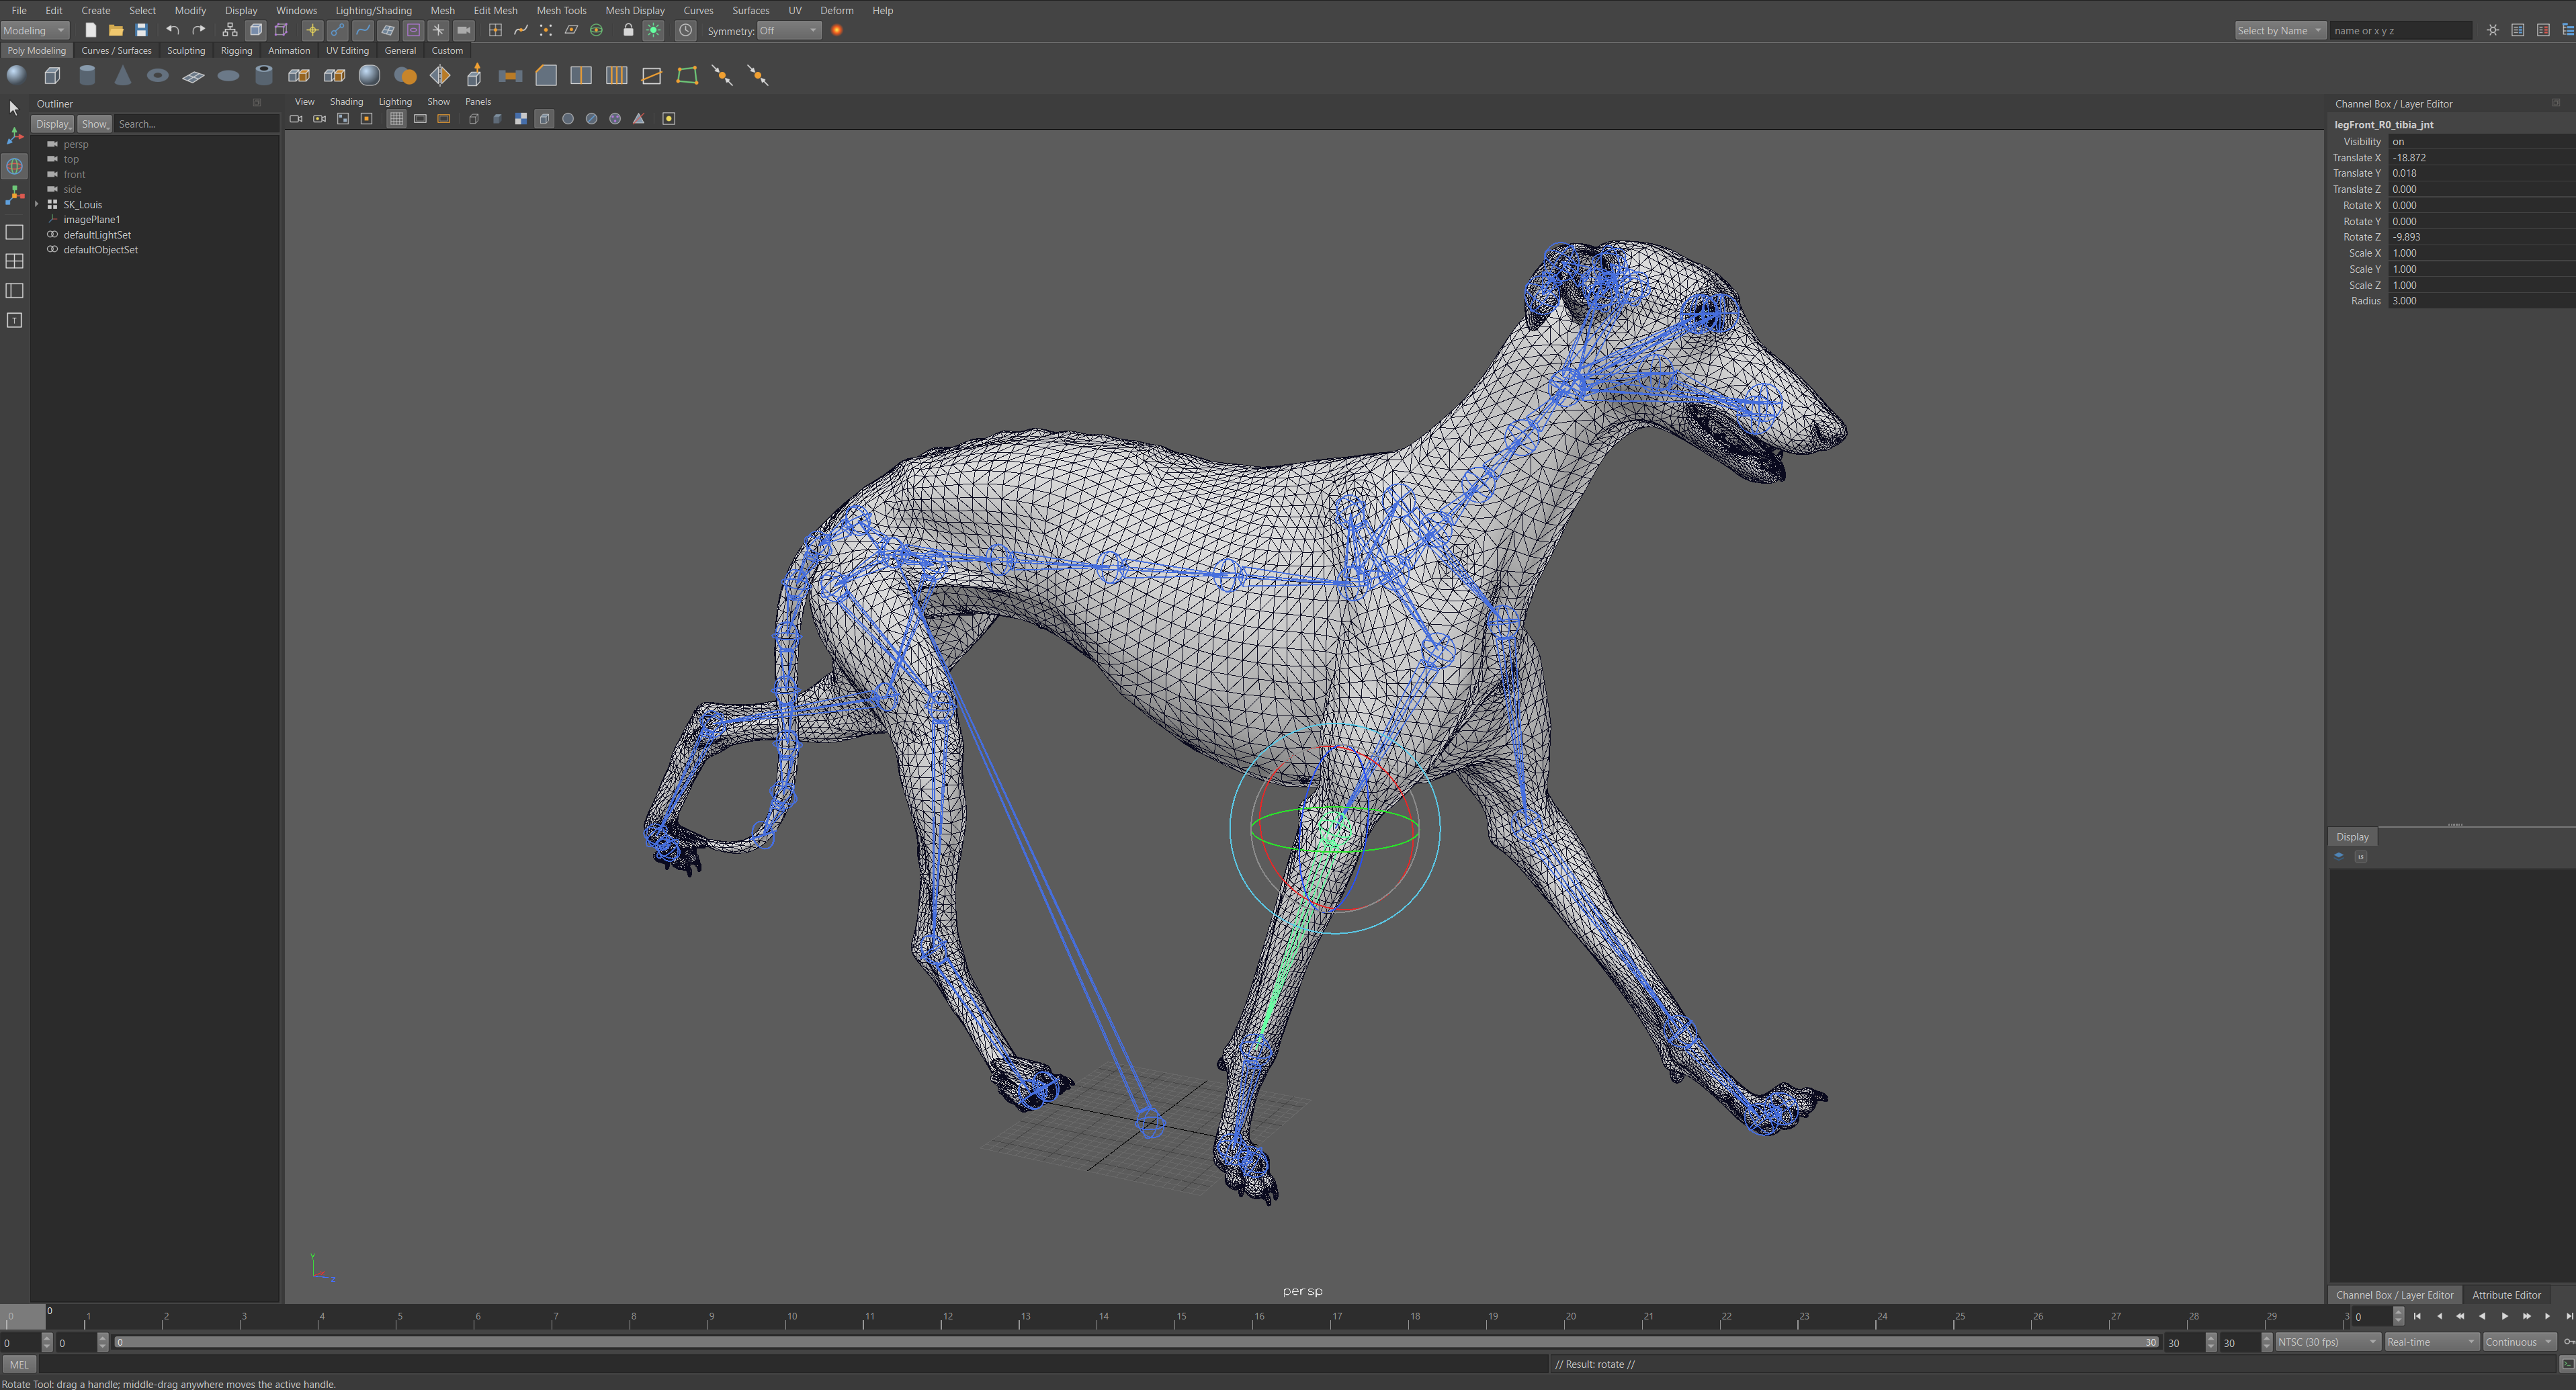
Skeleton A quadruped posed with the rotate tool.
Joints, smooth skin and an RP IK handle
Skin and IK Joints, smooth skin and an RP IK handle.
Paint Skin Weights
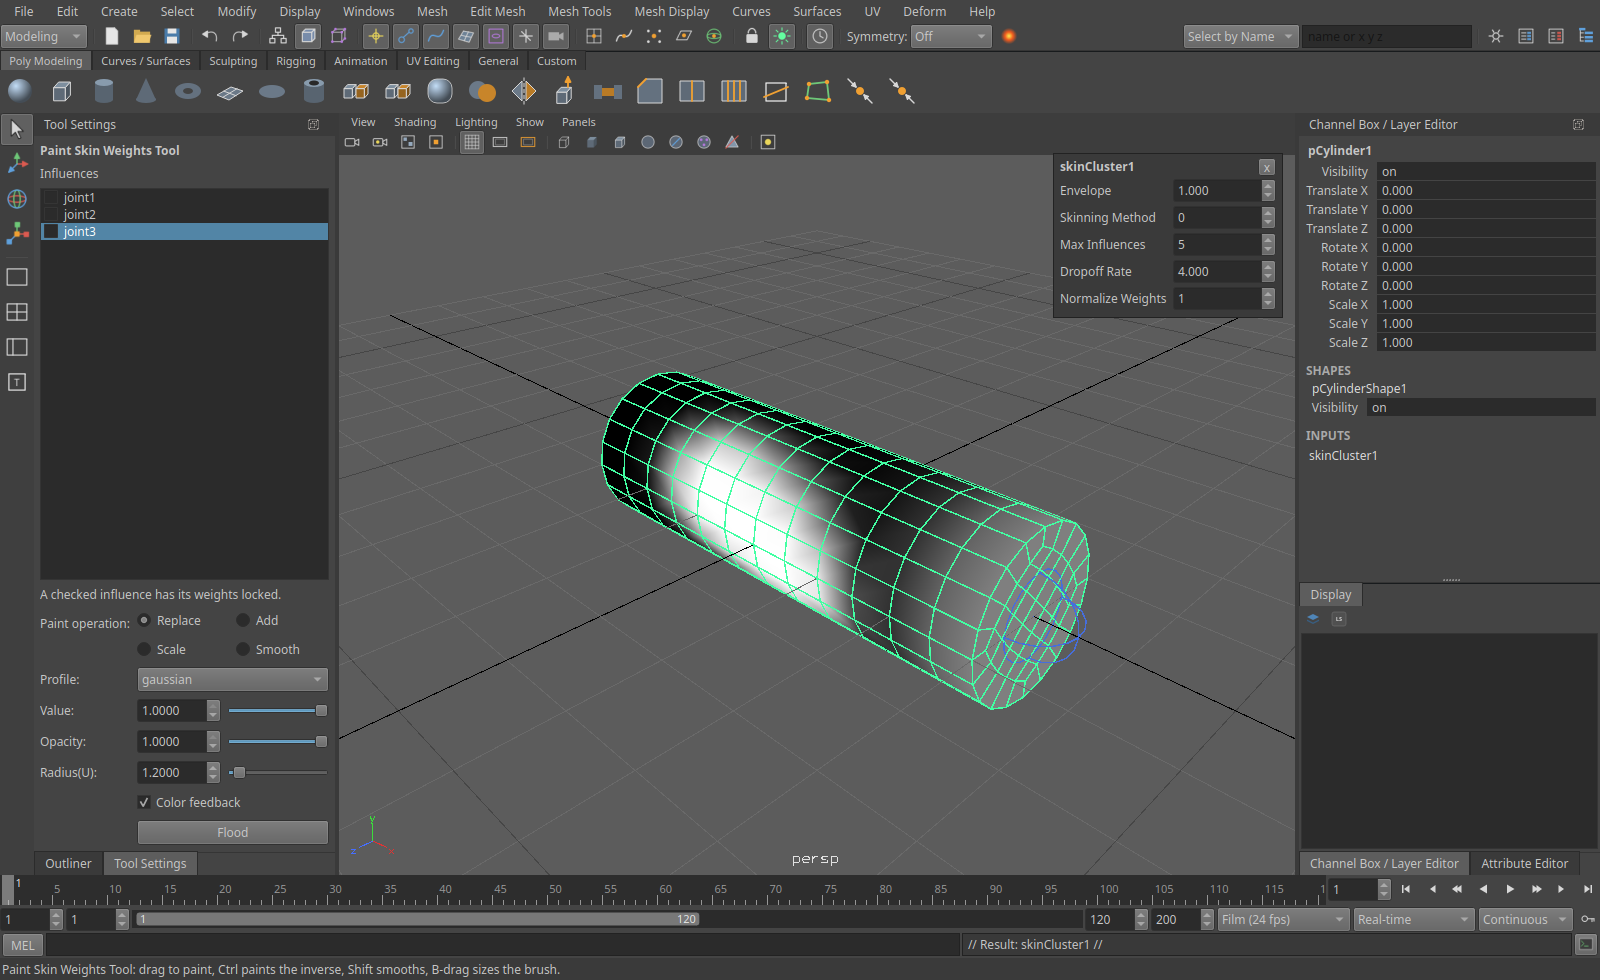
Paint Skin Weights Influences and brush in Tool Settings.
04Animation

Keys, curves and layers

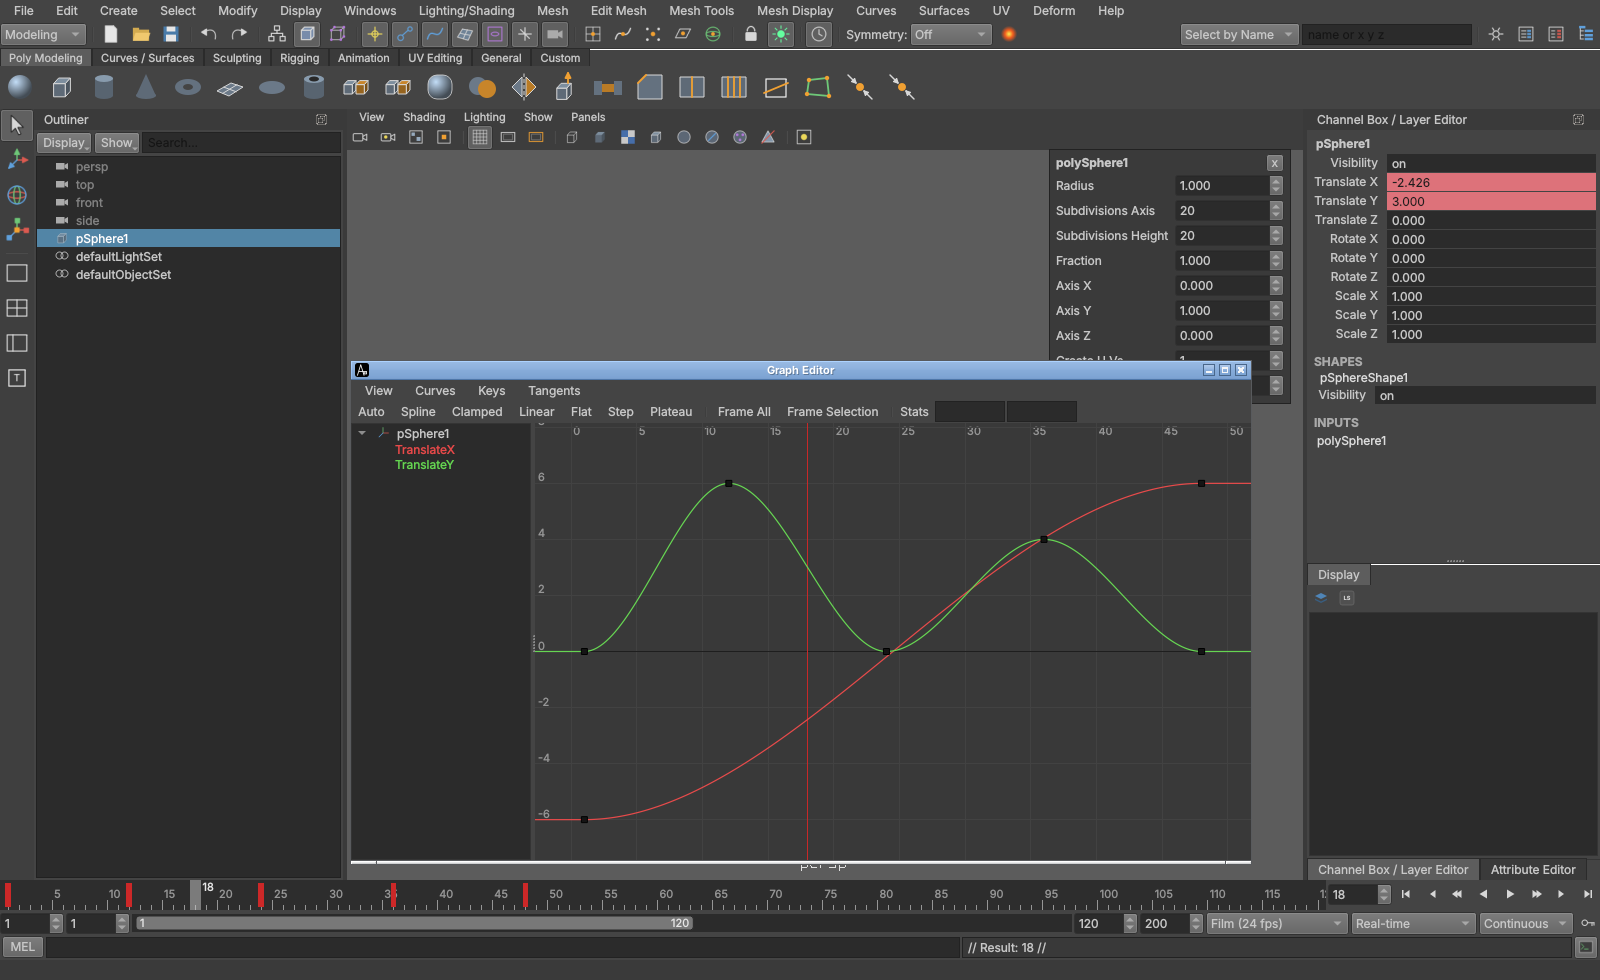
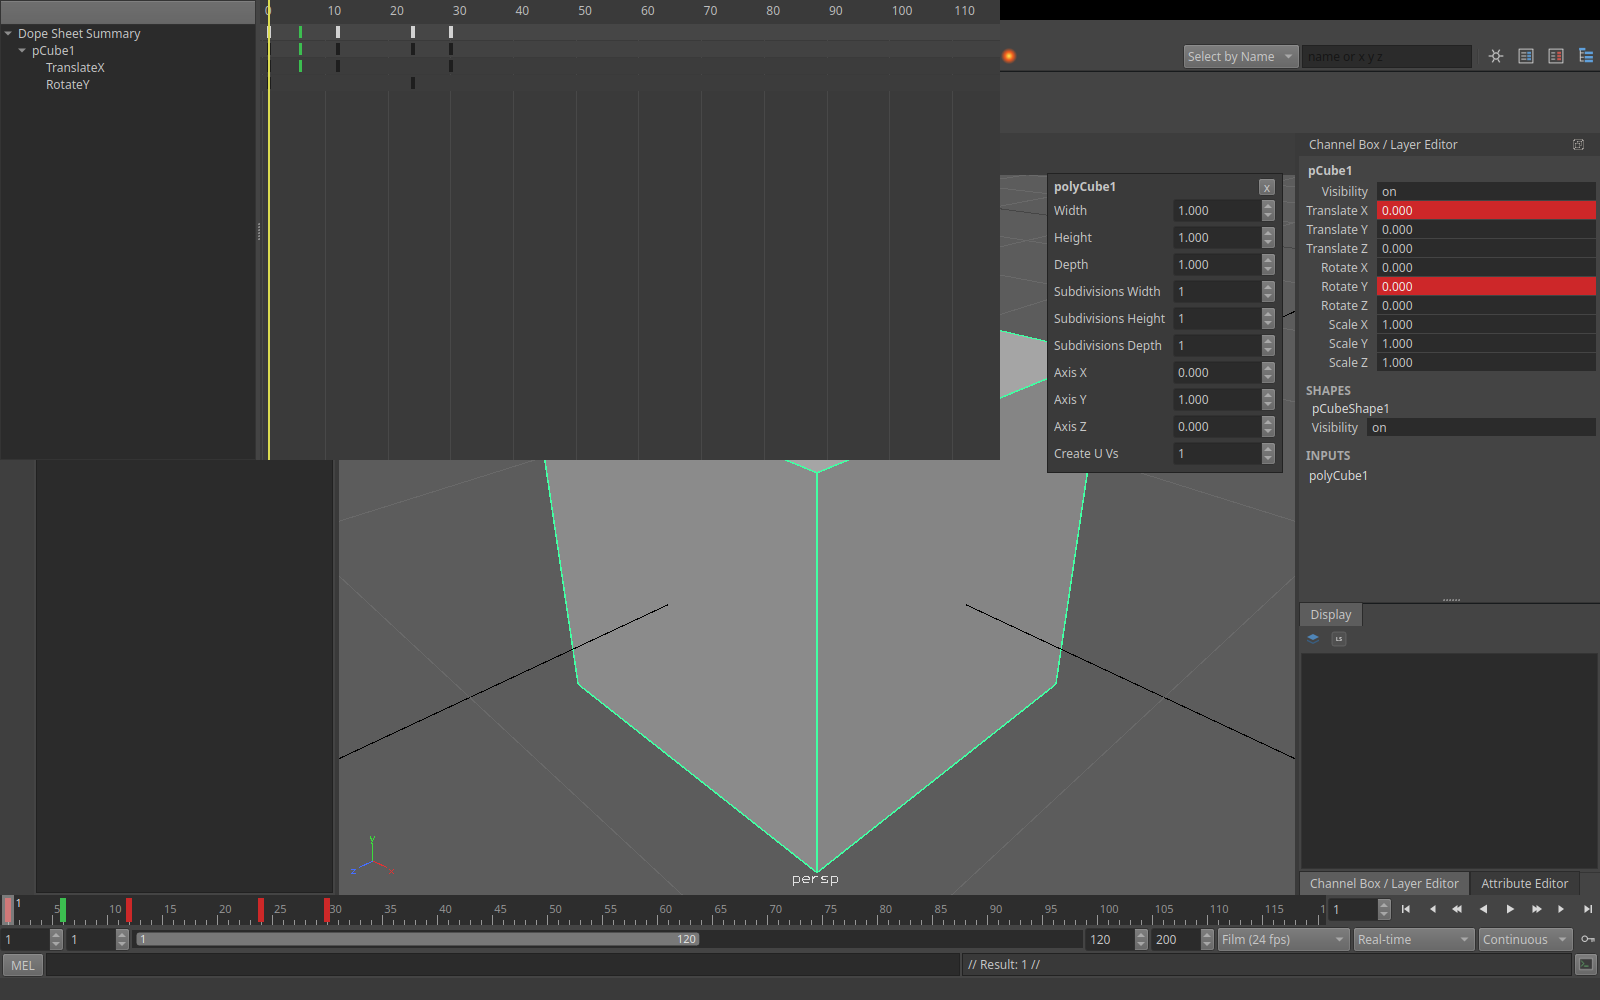
Keys with weighted tangents and infinities, in the Graph Editor and the Dope Sheet.

Set driven keys, breakdowns, copy and paste keys, baking, motion paths, motion trails, animation layers (additive, override, merge, extract), character sets and clips, and playblast to images or a movie.

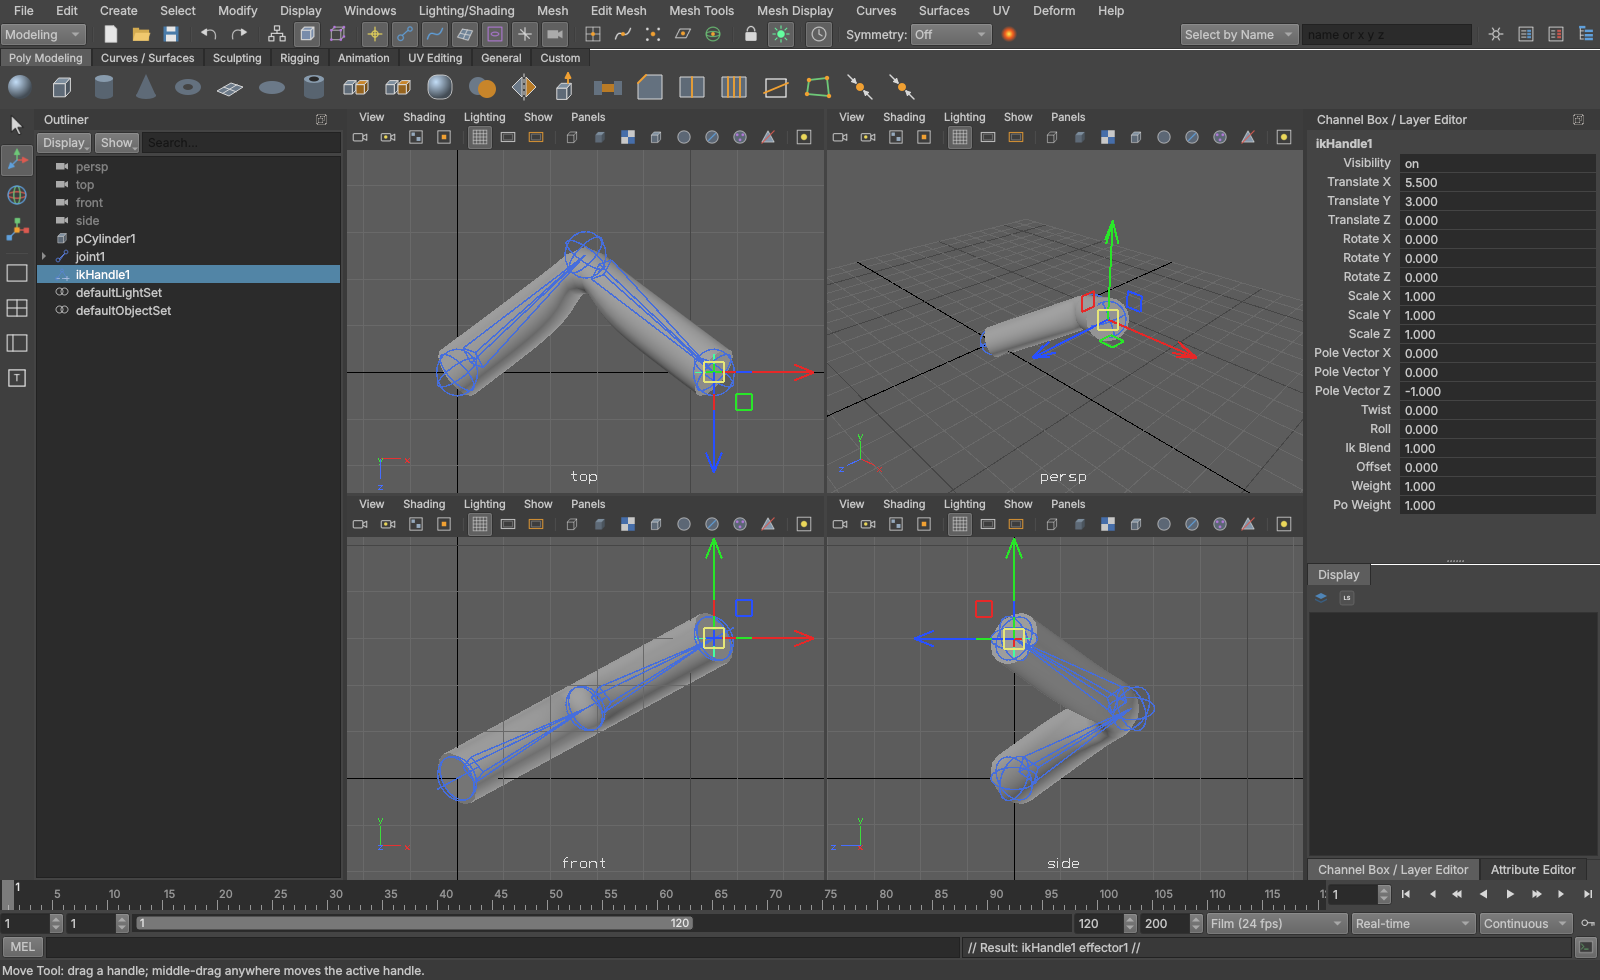
Playback A keyed IK arm with a pole vector and coloured controls.
Graph Editor
Graph Editor Keyed channels, key ticks on the time slider.
Dope Sheet with a breakdown
Dope Sheet A breakdown in green.
05Dynamics

Cloth, particles and rigid bodies in one solver

They all collide with and push each other in the same step.

Cloth on skinned or animated meshes with material presets, painted maps, colliders and constraints; emitters and fields; active and passive rigid bodies; caching to disk. It never explodes: a point it can't place leaves the simulation for a while and comes back, marked in the view. Older dynamics nodes in .ma files load into it.

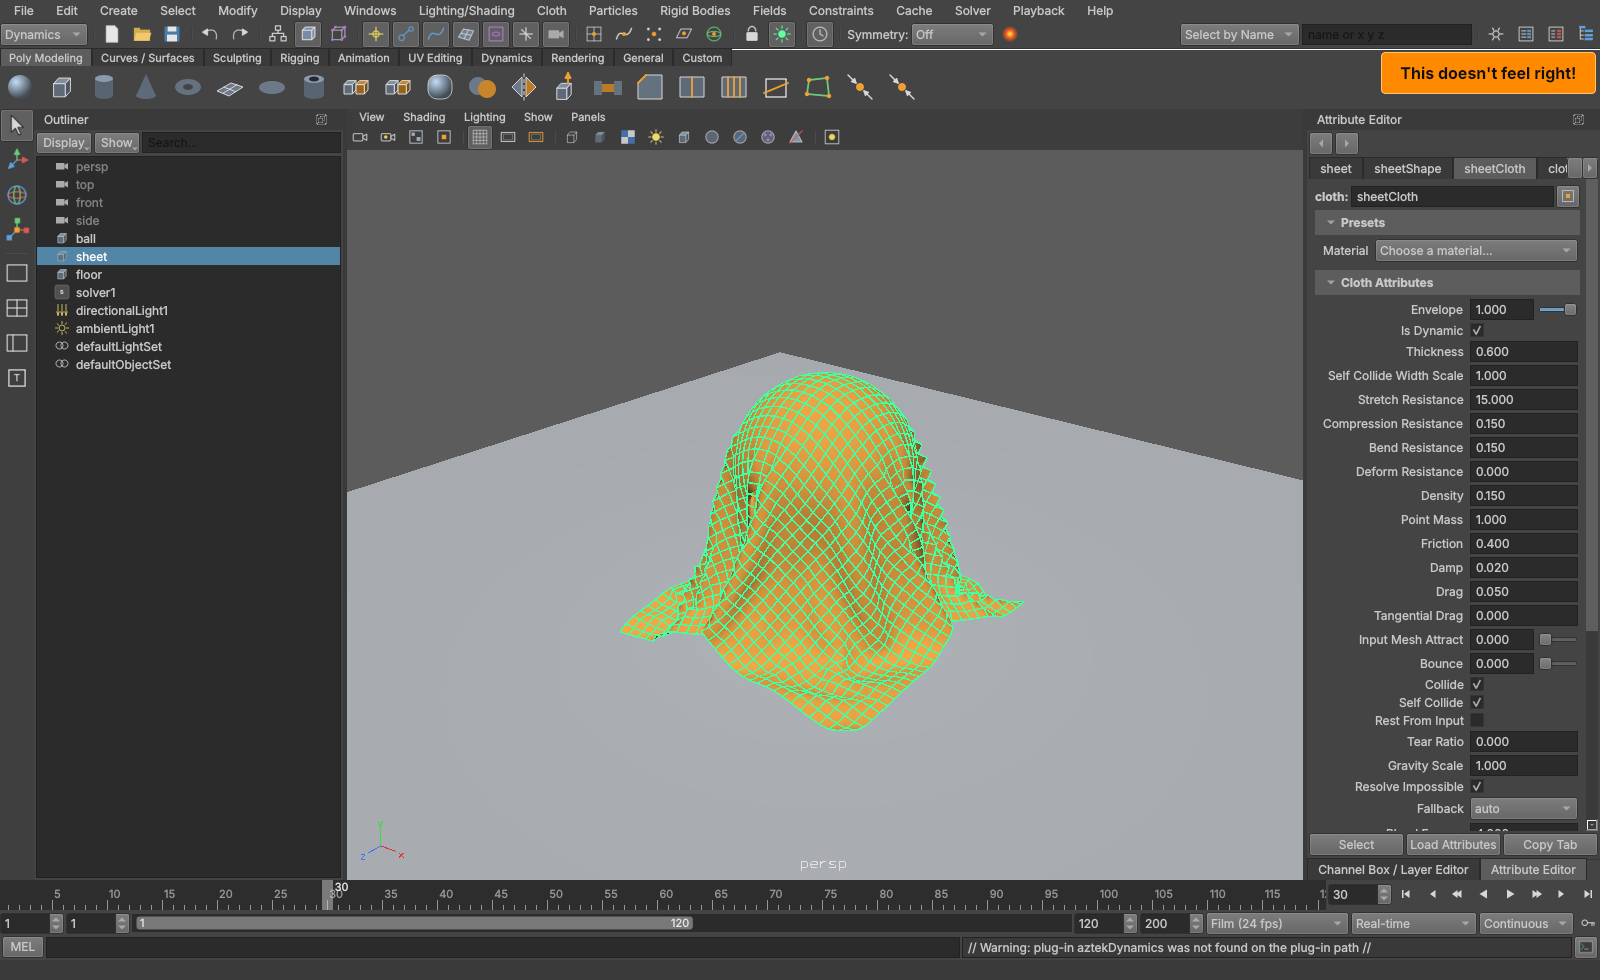
A cloth draped over a ball, with the cloth's attributes in the Attribute Editor
Dynamics menu set The sheet at frame 30, its cloth attributes in the Attribute Editor.
Cloth A sheet dropped on a ball, rendered with Harold frame by frame.
Rigid bodies A tower of blocks knocked down by a ball.
Rigid on cloth Boxes falling into a cloth hammock.
Particles An emitter, turbulence and a floor collider.
06Rendering

Harold, a physically based path tracer

Every material and light in a scene renders through it, on the CPU.

The standard surface with subsurface, coat, sheen, transmission and thin film; area, sky dome with HDR images, mesh and photometric lights; subdivision, displacement, motion blur and depth of field; AOVs into multi-layer EXR; interactive rendering in the Render View as the scene changes, and batch rendering with no display. The viewport lights a matte surface exactly as a render does: Use All Lights on 7, with decay, spot cones and highlights.

Interactive rendering The Render View keeping up with the camera as it moves round the rig.
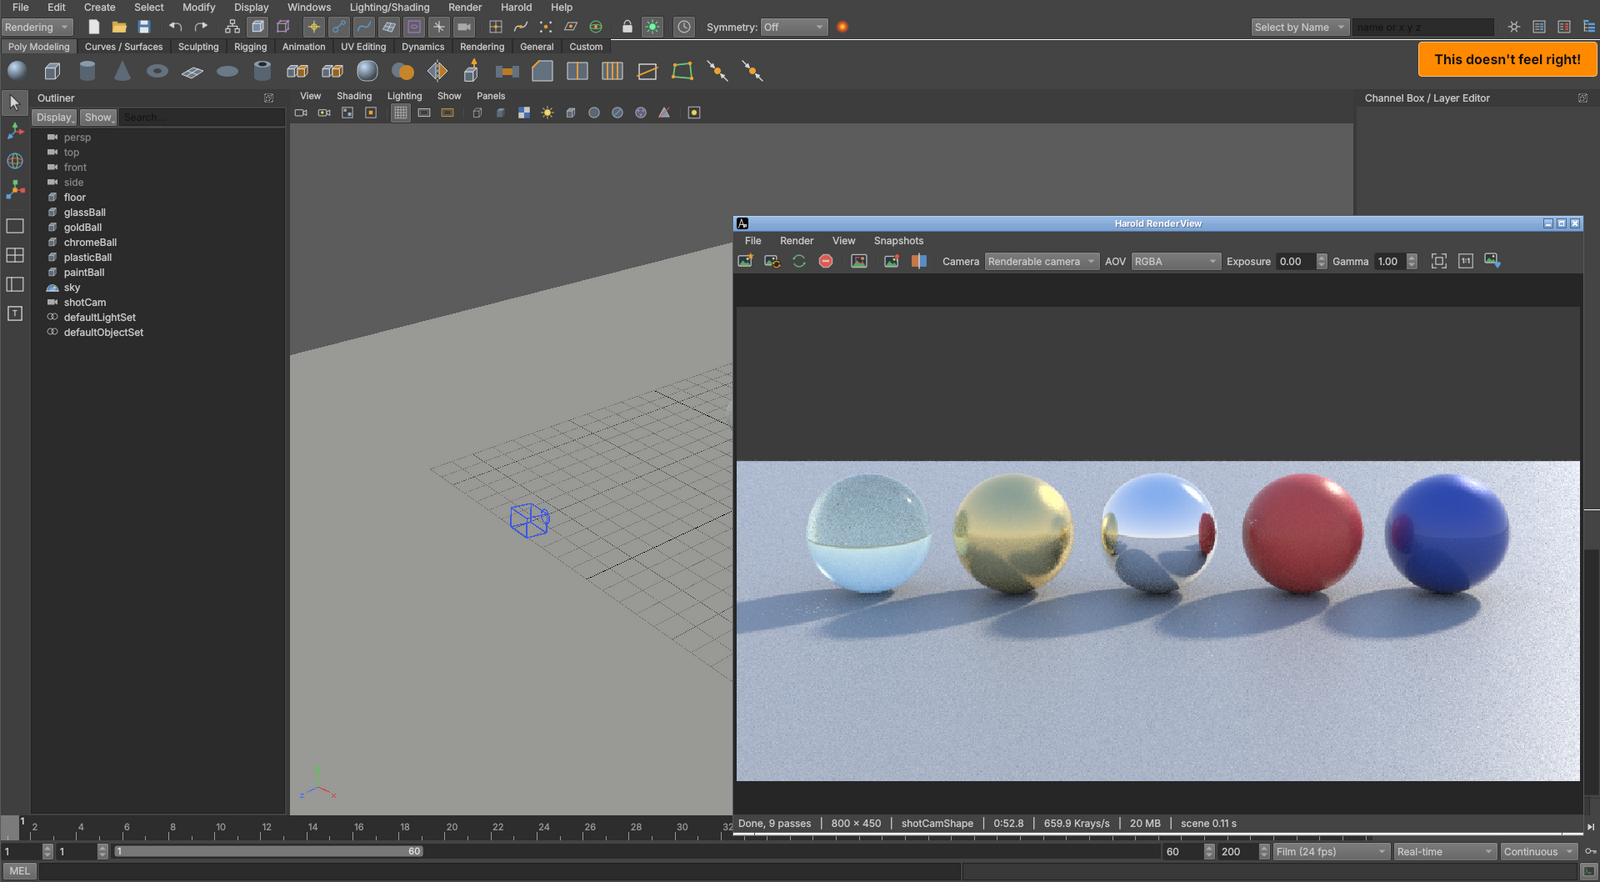
The Harold Render View over the main window
Render View Five materials under a sky dome, rendering progressively.
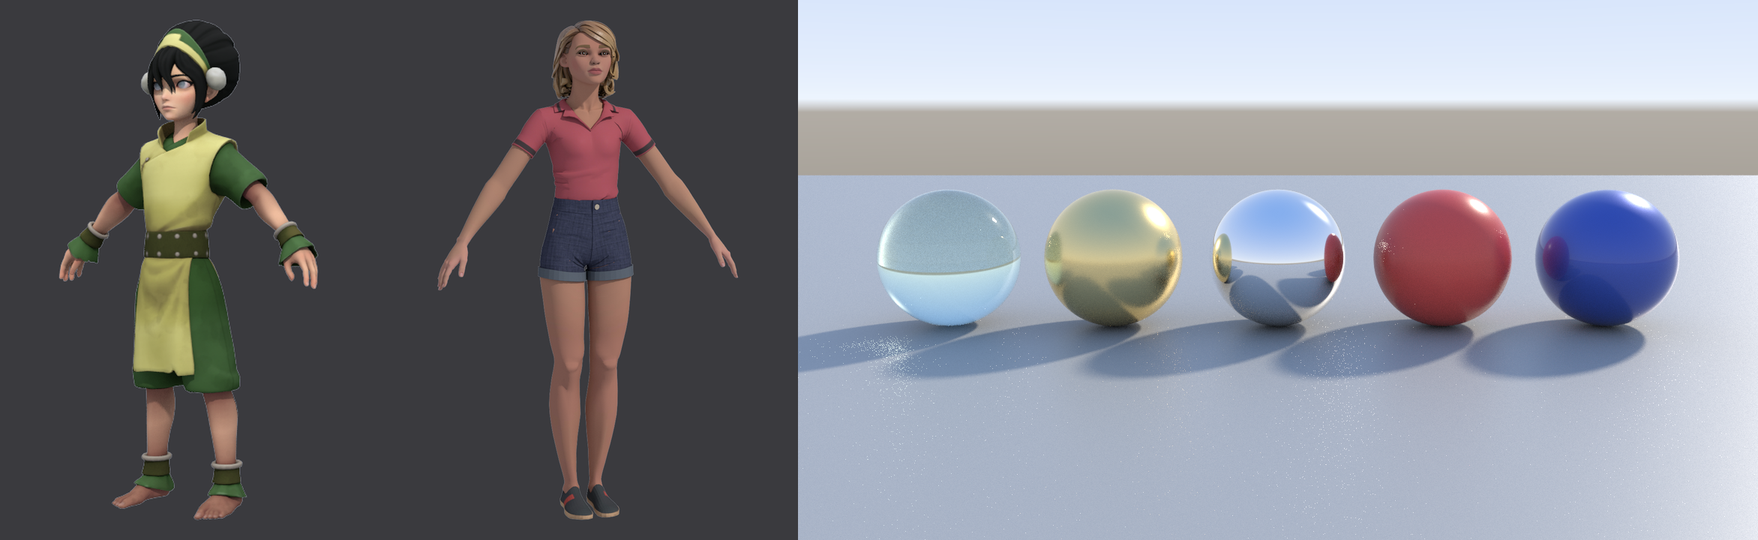
Two rigs and a row of materials rendered with Harold
Harold Two rigs and a row of materials, with a sky and a key light.
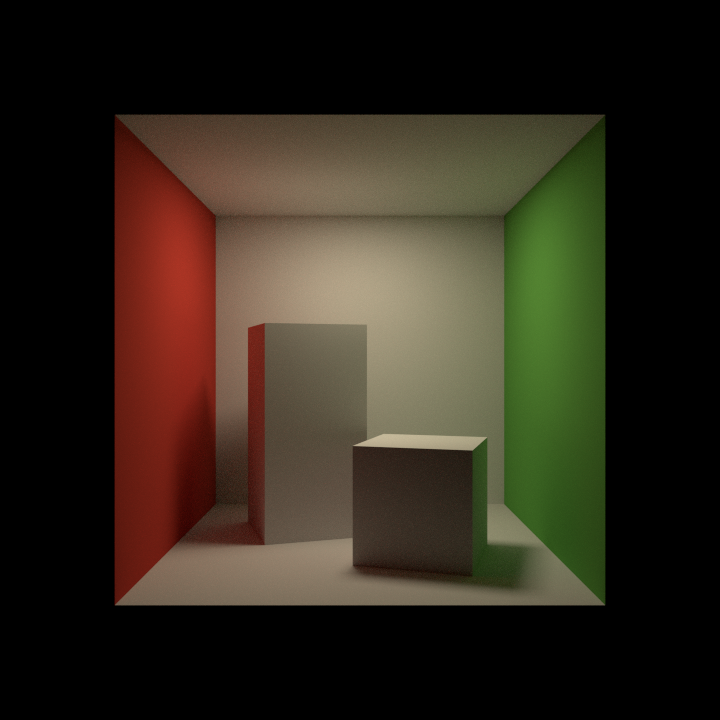
The Cornell box rendered with Harold
Cornell box One of the example scenes.
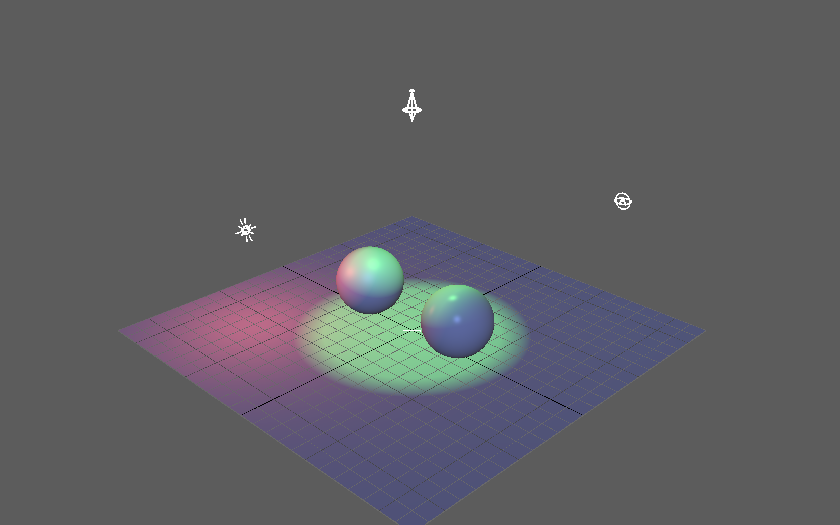
Lights in the viewport
Viewport lights Use All Lights, with blinn and phong highlights.
07Pipeline

.ma and .mb files, references and USD

Files read and written in the standard layout. Binary .mb files are read too.

Deformer chains, constraints, utility nodes, expressions, materials, NURBS, drawing overrides and references with their edits; namespaces, instances, locked nodes, Z up. USD (.usd, .usda, .usdc, .usdz) read and written with transforms, meshes, skeletons, blend shapes, materials and animation, or opened as a stage in the scene: prims to select and edit, variants, payloads, a Layer Editor, and a pxr module for scripts.

A character rig opened from a .ma file
.ma A character rig opened from its file with its textures.
08Scripting

MEL, Python, the API and plug-ins

Existing scripts import unchanged.

MEL (procedures, arrays, control flow, backticks, expressions) and Python with aztek.cmds and the compatibility modules; an API 2.0 subset, Python plug-ins with MPxCommand and MPxNode, scriptJob, scriptNode, evalDeferred. Windows, layouts and controls built from scripts become Qt widgets, with AE<type>Template procedures and workspaceControl docking.

from aztek import cmds
cube = cmds.polyCube(w=2)[0]
cmds.setKeyframe(cube, at='ty', t=1, v=0)
cmds.setKeyframe(cube, at='ty', t=24, v=5)
Script Editor A MEL script building cubes with expressions, then playing them.
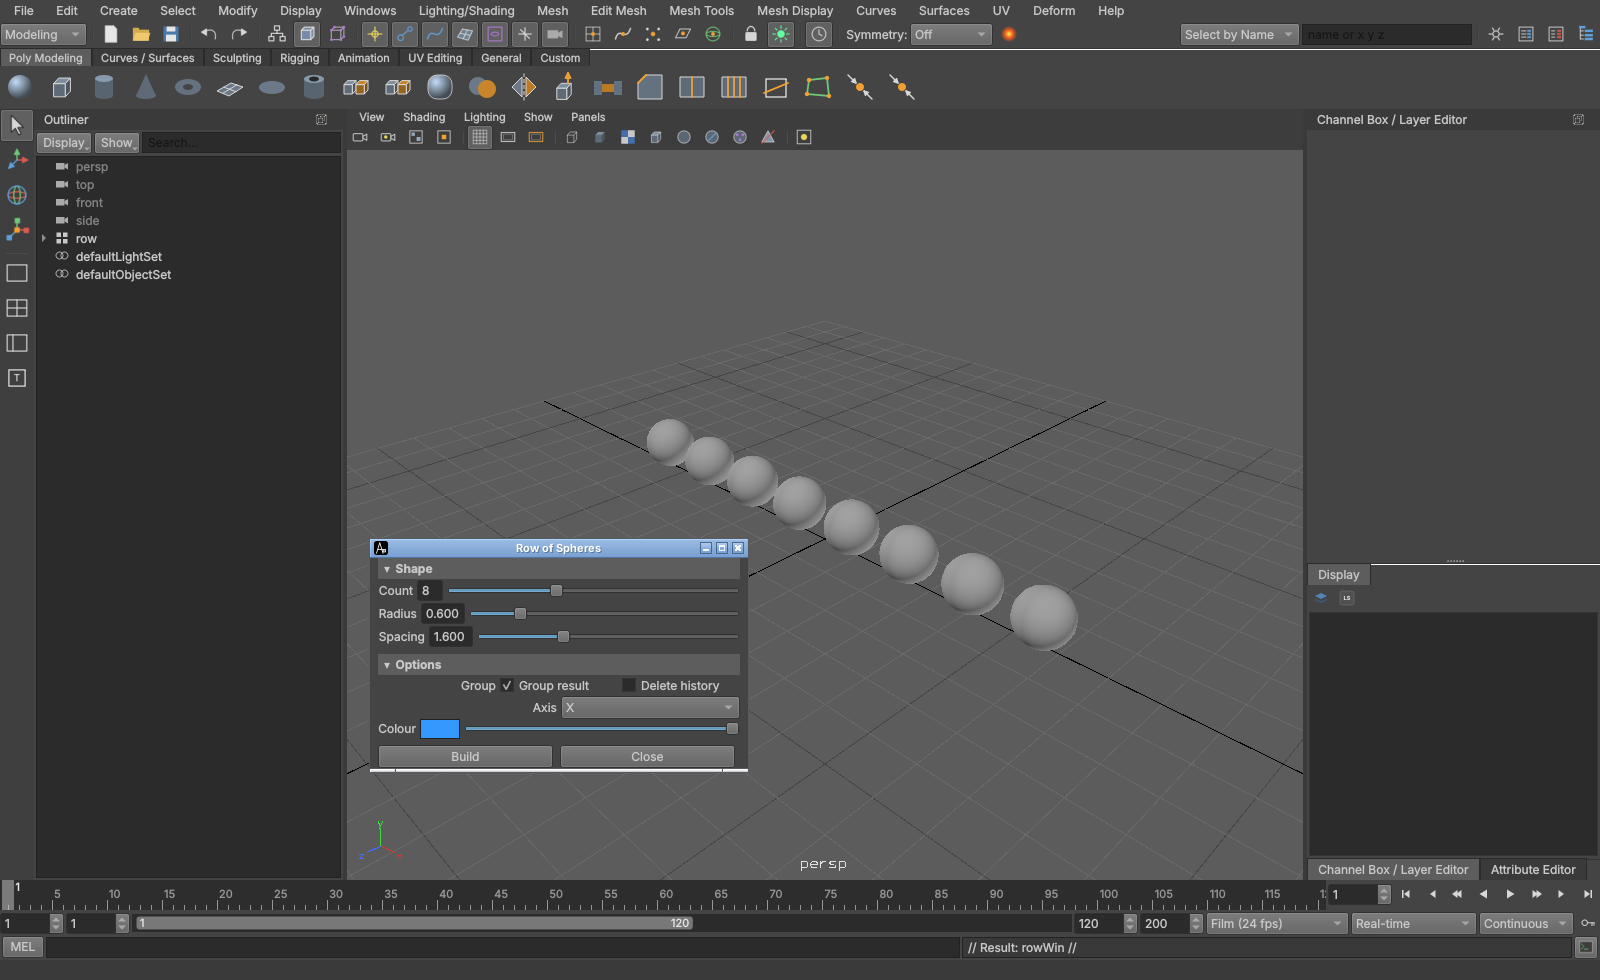
A window built from MEL
Script-built UI Sliders, a colour slider and buttons driving a procedure.
09Interface

Where your hands expect it

Menu sets, shelves, hotkeys, marking menus and the hotbox.

Channel box, outliner, Attribute Editor, Node Editor, Tool Settings, Hotkey Editor, panel layouts and workspaces. Manipulators on history and deformer nodes (T), with in-view numbers.

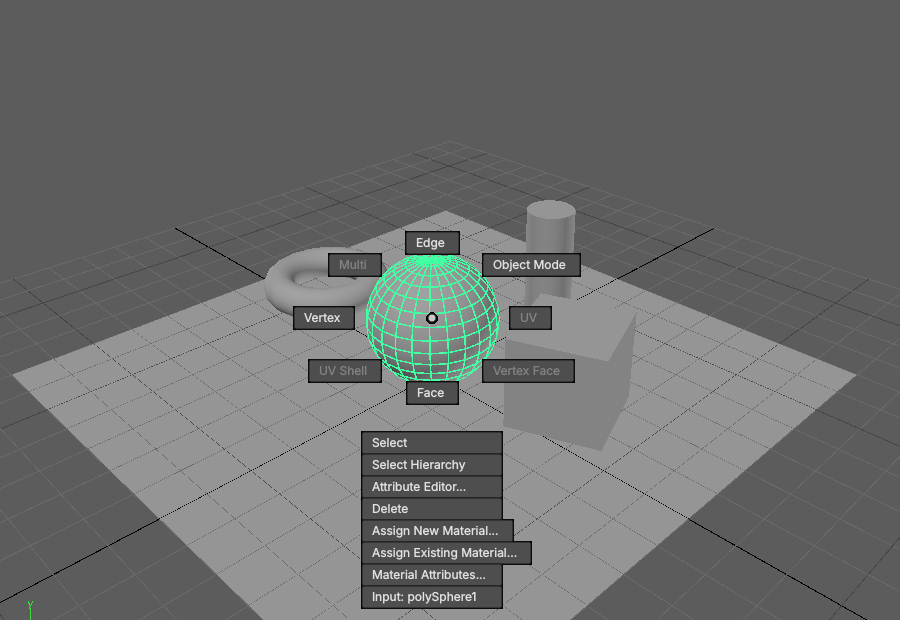
Marking menu
Marking menus On the right button.
Node Editor
Node Editor Graph the selection, wire attributes.
Four views
Four views Space to toggle.
10Examples

Over fifty scenes to open and pull apart

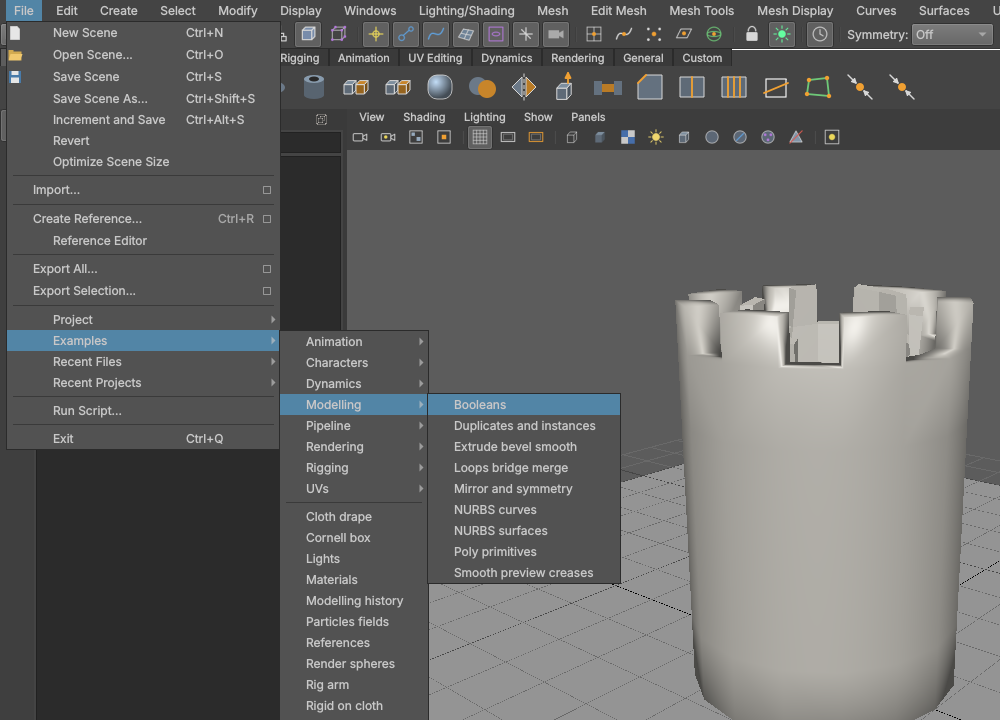
File > Examples, a submenu per area, plus scripts that open in the Script Editor.

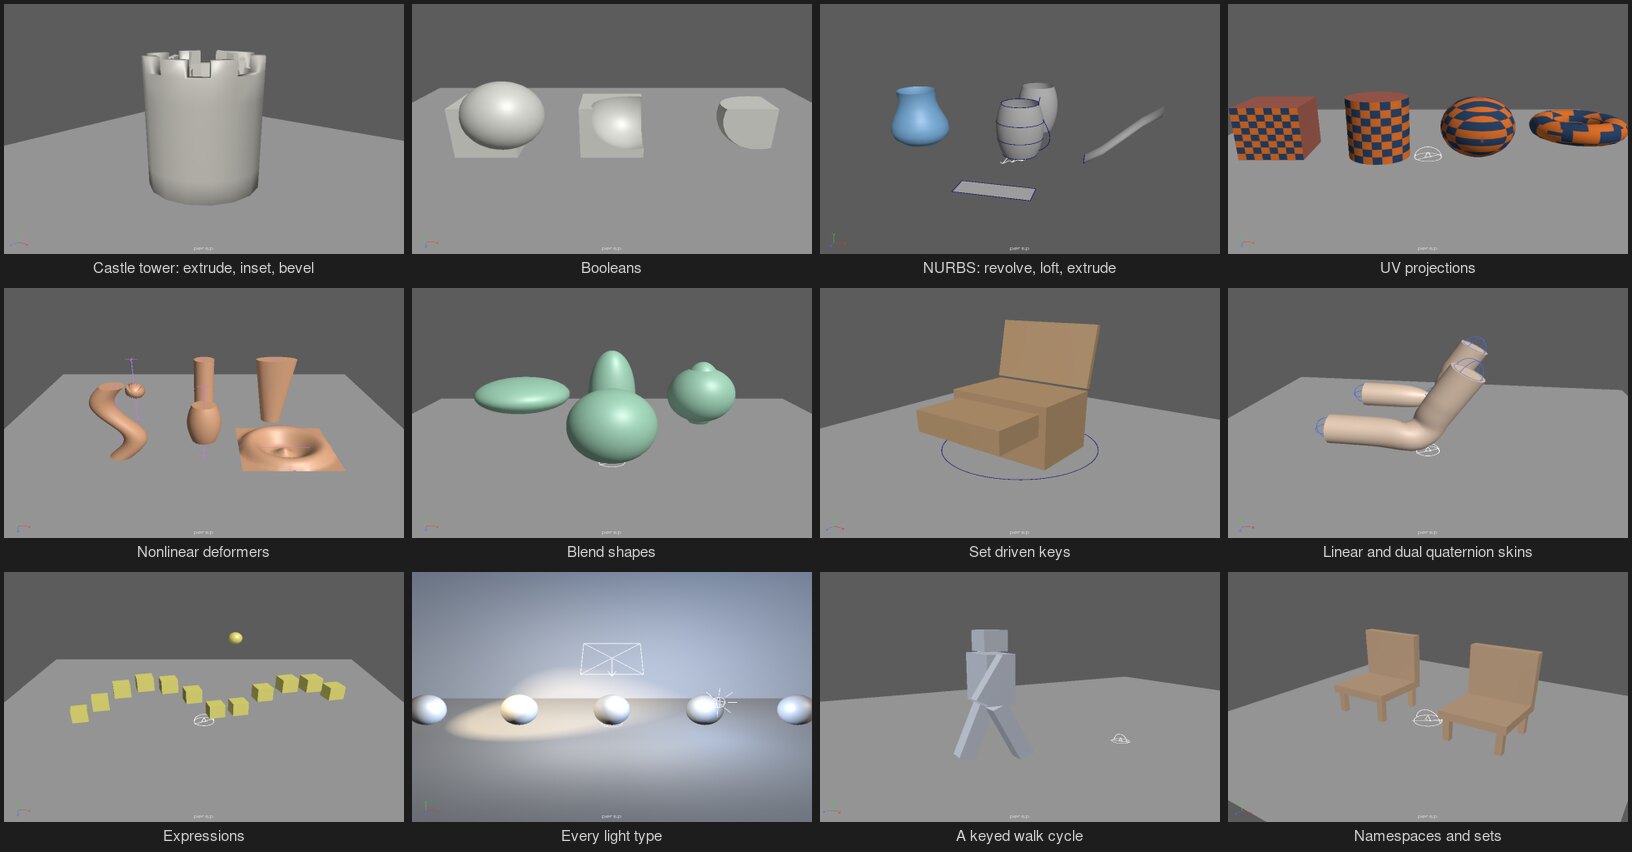
Modelling (every primitive, a castle tower all in history, booleans, mirroring, NURBS), UVs, rigging (every constraint, a reverse foot, spline IK, every deformer, linear against dual quaternion skins, set driven keys), a keyed walking robot, animation, dynamics (a flag in the wind, a tower knocked down, particles in a vortex), rendering (the standard surface's lobes, depth of field, motion blur, every light type) and pipeline (layers, namespaces, USD, nested references).

Twelve of the example scenes
A few of them Straight from the files, in the viewport.
File, Examples, Modelling submenu
File > Examples Every scene opens without a warning; a test plays each one.

In the works

Bicurious

Liquids, smoke, fire and procedural graphs inside the same solver as cloth, particles and rigid bodies, colliding with and pushing them.

Harold

Render layers and render setup, hair and curves, USD stages in renders.

Dynamics speed

Large cloth with self collision at interactive rates.

C++ plug-in kit

Rebuild a plug-in from its source against Aztek's headers. Commands, nodes and deformers load; more classes are coming.

Build from source

git clone https://github.com/srlegrand/Aztek.git
cd Aztek
./build.sh --deps --run        # Linux
./build-macos.sh --deps --run  # macOS, with Homebrew
build.bat -Run                 # Windows

Needs Rust, CMake, Ninja, Qt 6.4+, Python 3 and, on Windows, Visual Studio 2022 with the C++ workload. On macOS, --deps installs everything through Homebrew and --package makes a self-contained Aztek.app. Details in the README.

Licence

Aztek is free and open source under MIT-0. Use, copy, change, sell, re-host and redistribute it however you like, with no attribution required. Copies on any other host are welcome. It comes with no warranty of any kind.